• Skip to main content
  • Skip to primary sidebar
  • Skip to footer

SarasYummyRecipes logo

  • Home
  • Baked Delicious
    • Eggless / Egg free Baking
    • Baked Recipes
  • International Recipes
  • South Indian
    • Festival Recipes
    • Rice Recipes
    • Side dish for Rice
    • Lunch Recipes
  • Contact Me

Rice Recipes

Vanjaram Varuval

April 11, 2016 Fish

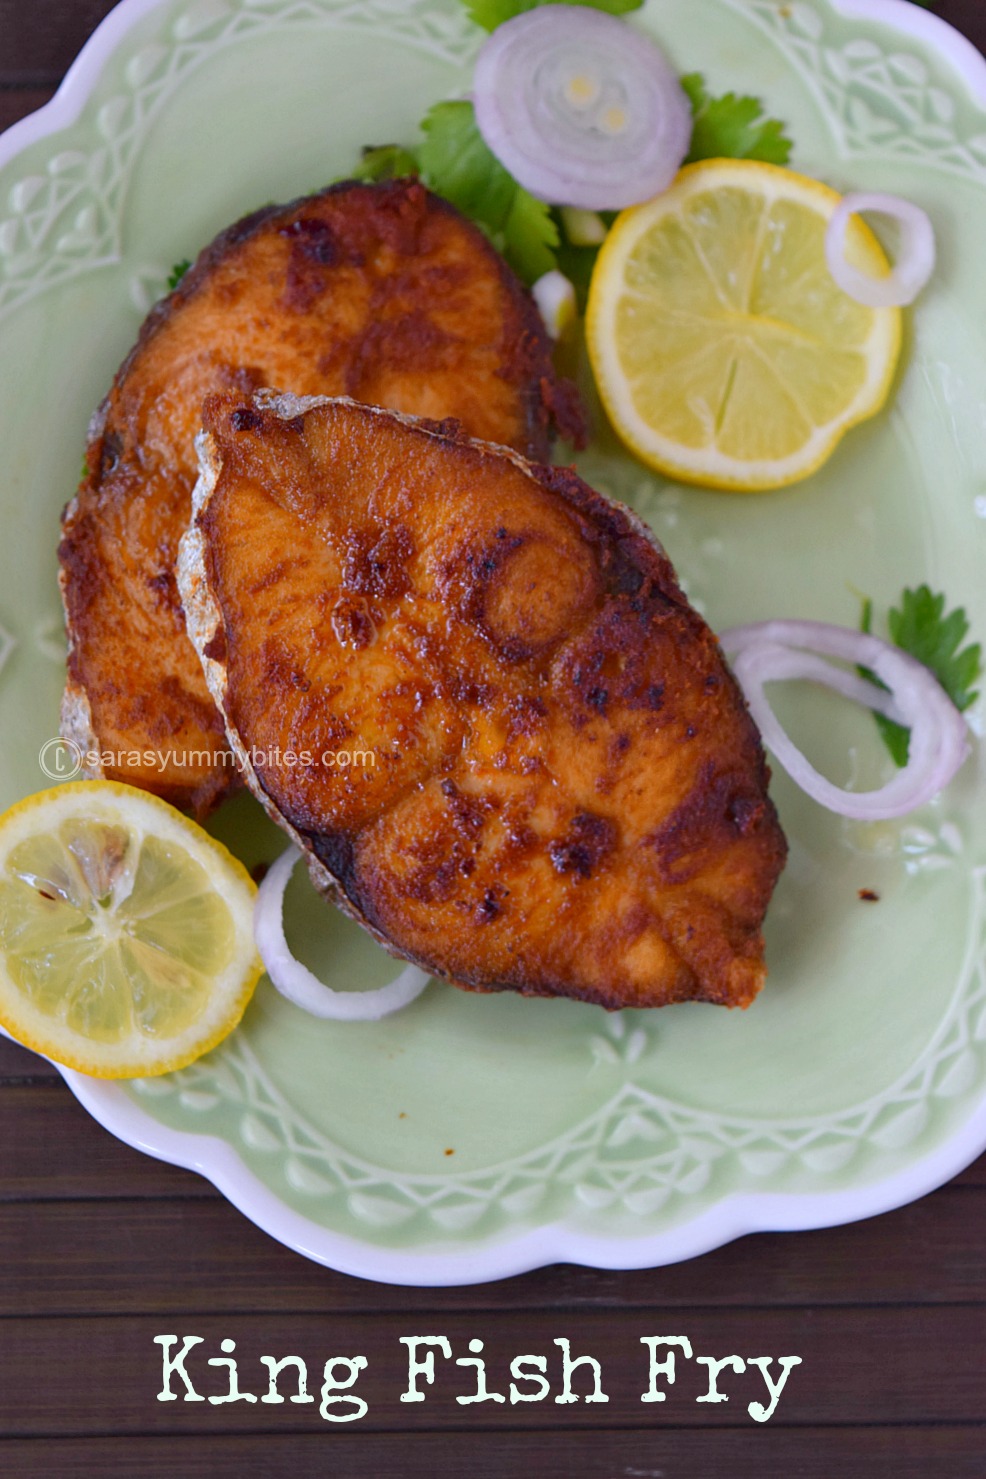
Hotel Style Fish Fry / Hotel Vanjara Meen Varuval / Nei Meen Varuval

Hotel Style Fish Fry / Hotel Vanjara Meen Varuval

                           King fish is a perfect dining entree available in most of the restaurant.  Marinated with freshly ground masala and cooked either by deep fry or shallow fry makes it irresistible appetizer.

Preparation time: 10 ~ 15 minutes
Cooking time: 15 ~ 20 minutes
Yield:  5 ~ 7
Sources: www.sarasyummyrecipes.com
Ingredients:
5 ~ 7 Seer fish / king fish slices / vanjaram meen
Black pepper powder as needed (optional)
Oil to fry
Minced cilantro
For  Paste:
2 tbsp. red chili powder
1 tbsp. coriander powder
½ tsp fennel seed powder
1 tsp lemon juice from fresh lemon
½ tsp turmeric Powder
¼ tsp tamarind  paste
1 tbsp. rice flour / corn flour
½ tsp garam masala powder
Salt to taste
Method:
1.Clean and wash fish slices thoroughly. Keep it aside
2.In a separate bowl, mix the listed paste ingredients. Adjust salt and spice as needed.
3. Marinate fish slices with the prepared paste. Refrigerate the marinated fish for minimum half an hour.
4. Before frying the fish, remove the  marinated fish slices from the refrigerator and keep it aside to bring it to room temperature.
5. Heat griddle on low heat,  add 2 tbsp. of oil. Place the required fish slices on griddle  depends on the its size. Reduce the heat and cook it 5 ~ 7 minutes on one side.

Hotel Style Fish Fry / Hotel Vanjara Meen Varuval


6. Flip the fish to other side and cook for another 5~7 minutes in low heat. If needed, add extra oil to avoid slices sticking to the griddle.

7. Remove the fish slices when both side becomes golden brown colour and well done. If needed, sprinkle pepper powder over the fish. Garnish with minced cilantro. Serve hot with sambar and rasam rice.
    PRINT HERE
    Hotel Style Fish Fry / Hotel Vanjara Meen Varuval


    Preparation time: 10 ~ 15 minutes 

    Cooking time: 15 ~ 20 minutes
    Yield:  5 ~ 7
    Sources: www. sarasyummyrecipes.com


    Ingredients:
    5 ~ 7 Seer fish / king fish slices / vanjaram meen
    Black pepper powder as needed (optional)
    Oil to fry
    Minced cilantro

    For  Paste:
    2 tbsp. red Chili powder 
    1 tbsp. coriander powder 
    ½ tsp fennel seed powder 
    1 tsp lemon juice from fresh lemon
    ½ tsp turmeric Powder 
    ¼ tsp tamarind  paste 
    1 tbsp. rice flour / corn flour 
    ½ tsp garam masala powder 
    Salt to taste


    Method


    1. Clean and wash fish slices thoroughly. Keep it aside
    2. In a separate bowl, mix the listed paste ingredients. Adjust salt and spice as needed.
    3. Marinate fish slices with the prepared paste. Refrigerate the marinated fish for minimum half an hour or till needed.
    4. Before frying the fish, remove the  marinated fish slices from the refrigerator and keep it aside to bring it to room temperature.
    5. Heat griddle on low heat,  add 2 tbsp. of oil. Place the required fish slices on griddle  depends on the its size. Reduce the heat and cook it 5 ~ 7 minutes on one side.
    6. Flip the fish to other side and cook for another 5~7 minutes in low heat. If needed, add extra oil to avoid slices sticking to the griddle. 
    7. Remove the fish slices when both side becomes golden brown colour and well done. If needed, sprinkle pepper powder over the fish. Garnish with minced cilantro. Serve hot with sambar and rasam rice.

     www.sarasyummyrecipes.com


    Hotel Style Fish Fry / Hotel Vanjara Meen Varuval

    Check out the Blogging Marathon page for the other Blogging Marathoners doing BM# 63

    An InLinkz Link-up


    <!-- end InLinkz script →

    April 10, 2016 South Indian

    Gothumai Rava upma / Crackled wheat Upma with Bell pepper

    Gothumai Rava upma / Crackled wheat Upma with Bell pepper

    Preparation time: 10 minutes
    Cooking time: 20 ~ 30 minutes
    Serve 2
    Source: sarasyummyrecipes.com

    Ingredients:
    3 shallot / small onion, medium size
    1 small tomato
    1 bell pepper , any color
    3 green chillies or to taste, Split into two
    ½ cup crackled wheat rava
    ¼ tsp turmeric powder
    ½ tsp red chili powder (optional)
    Salt to taste
    Minced cilantro as needed

    For Seasoning:
    2 tbsp. cooking oil
    ½ tsp mustard seeds
    1 string curry leaves
    1 /2 tsp minced ginger
    2 tsp urad dhal
    2 tsp channa dhal

    Gothumai Rava upma / Crackled wheat Upma with Bell pepper
    Method:
    1. Wash and chop the vegetables to required size and shape. Set aside.
    2.  Heat oil in heavy bottom pan, add mustard seeds. Once it pop, add remaining seasoning ingredients. Saute for few second to change it color and become crispy.
    3. Throw in onions, chilies. Sauté for few minutes. When it become soft and transparent, add tomatoes. Cook for few minutes till it become soft. Followed by bell pepper. Cook for 3~ 5 minutes. Add turmeric and chili powder(optional) along with salt. Stir for few seconds.
    4. Pour in 2 cups boiling water( this makes cooking easier). When it starts to boil, add ½ cup of crackled wheat. Mix once to avoid any lumps. Adjust salt to taste. Cover and cook it for 15 minutes. Stir in between. Once done, turn of the heat and add 1 tsp of ghee for flavor.  Transfer it to serving dish and garnish with cilantro. Serve hot with coconut chutney or sambhar.
    PRINT HERE
    Gothumai Rava upma / Crackled wheat Upma with Bell pepper
    Preparation time: 10 minutes
    Cooking time: 20 ~ 30 minutes
    Serve 2
    Source: sarasyummyrecipes.com
     
    Ingredients:
    3 shallot / small onion, medium size
    1 small tomato
    1 bell pepper , any color
    3 green chillies or to taste, Split into two
    ½ cup crackled wheat rava
    ¼ tsp turmeric powder
    ½ tsp red chili powder (optional)
    Salt to taste
    Minced cilantro as needed
     
    For Seasoning:
    2 tbsp. cooking oil
    ½ tsp mustard seeds
    1 string curry leaves
    1 /2 tsp minced ginger
    2 tsp urad dhal
    2 tsp channa dhal
     
    Method:
    1. Wash and chop the vegetables to required size and shape. Set aside.
    2.  Heat oil in heavy bottom pan, add mustard seeds. Once it pop, add remaining seasoning ingredients. Saute for few second to change it color and become crispy.
    3. Throw in onions, chilies. Sauté for few minutes. When it become soft and transparent, add tomatoes. Cook for few minutes till it become soft. Followed by bell pepper. Cook for 3~ 5 minutes. Add turmeric and chili powder(optional) along with salt. Stir for few seconds.
    4. Pour in 2 cups boiling water( this makes cooking easier). When it starts to boil, add ½ cup of crackled wheat. Mix once to avoid any lumps. Adjust salt to taste. Cover and cook it for 15 minutes. Stir in between. Once done, turn of the heat and add 1 tsp of ghee for flavor.  Transfer it to serving dish and garnish with cilantro. Serve hot with coconut chutney or sambhar.
     www.sarasyummyrecipes.com

    Check out the Blogging Marathon page for the other Blogging Marathoners doing BM# 63

    An InLinkz Link-up

    April 8, 2016 Poriyal/ Karikai

    French Beans Usili / Green Beans Usili / Beans Usili

     
    French Beans Usili / Green Beans Usili / Beans Usili
     
    Preparation: 20 ~ 30 minutes
    Soaking time: 2 ~ 4 hours
    Cooking time: 25 ~ 35 minutes
    Source: sarasyummyrecipes.com
     
    Ingredients:
    1 lb / 500 grams beans
    Salt to taste
     
    For Paruppu Usili:
    ¾ cup toor dhal
    ½ cup channa dhal
    5 ~ 6 red chillies 
    1 inch ginger
    ½ tsp cumin
    ½ cup shredded coconut or whole coconut cut it into pieces
    Salt to taste
    ½ tsp turmeric powder
     
    For Seasoning:
    2 tbsp cooking oil
    ½ tsp mustard seeds
    1 red chili, broken into pieces or to taste
    2 string curry leaves
    Minced cilantro (optional)
     
    Method:
    1. Wash and soak both the dhal for 2 ~ 4 hours, depends on your time availability.
    2. Wash and remove the string from beans and chop them in to pieces. Set aside.
    3. Grind all the grinding ingredients listed above in to fine paste, not too smooth.
     
    French Beans Usili / Green Beans Usili / Beans Usili


    French Beans Usili / Green Beans Usili / Beans Usili
     
    4. Steam the ground dhal in a greased idly plate or bowl for 15 ~ 20 minutes. Turn off the heat and allow the mixture to cool.  Once it comes to room temperature, scramble it with your fingers or using fork.
    5. Heat a pan with 2 tbsp. oil and add mustard to crackle. Then add chilies, curry leaves. Sauté for few seconds.
    French Beans Usili / Green Beans Usili / Beans Usili


    French Beans Usili / Green Beans Usili / Beans Usili
    6. Throw in chopped beans and sauté for 5 minutes. Pour in ½ cup of water and salt. cook it with out covering the pan in medium heat. Stir in between.
    7.  When beans become soft, throw in scrambled dhal mixture to the beans and mix to corporate the mixture to beans. Adjust salt to taste. Serve hot with rice. 
     
    PRINT HERE
    French Beans Usili / Green Beans Usili / Beans Usili
     
    Preparation: 20 ~ 30 minutes
    Soaking time: 2 ~ 4 hours
    Cooking time: 25 ~ 35 minutes
    Source: sarasyummyrecipes.com
     
     
    Ingredients:
    1 lb / 500 grams beans
    Salt to taste
     
    For Paruppu Usili:
    ¾ cup toor dhal
    ½ cup channa dhal
    5 ~ 6 red chillies 
    1 inch ginger
    ½ tsp cumin
    ½ cup shredded coconut or whole coconut cut it into pieces
    Salt to taste
    ½ tsp turmeric powder
     
    For Seasoning:
    2 tbsp cooking oil
    ½ tsp mustard seeds
    1 red chili, broken into pieces or to taste
    2 string curry leaves
    Minced cilantro (optional)
     
    Method:
    1. Wash and soak both the dhal for 2 ~ 4 hours, depends on your time availability.
    2. Wash and remove the string from beans and chop them in to pieces. Set aside.
    3. Grind all the grinding ingredients listed above in to fine paste, not too smooth.
    4. Steam the ground dhal in a greased idly plate or bowl for 15 ~ 20 minutes. Turn off the heat and allow the mixture to cool.  Once it comes to room temperature, scramble it with your fingers or using fork.
    5. Heat a pan with 2 tbsp. oil and add mustard to crackle. Then add chilies, curry leaves. Saute for few seconds.
    6. Throw in chopped beans and sauté for 5 minutes. Pour in ½ cup of water and salt. cook it with out covering the pan in medium heat. Stir in between.
    7.  When beans become soft, throw in scrambled dhal mixture to the beans and mix to corporate the mixture to beans. Adjust salt to taste. Serve hot with rice. 
     www.sarasyummyrecipes.com

    Check out the Blogging Marathon page for the other Blogging Marathoners doing BM# 63


    An InLinkz Link-up


    April 7, 2016 Gravy/ Curry for Rice

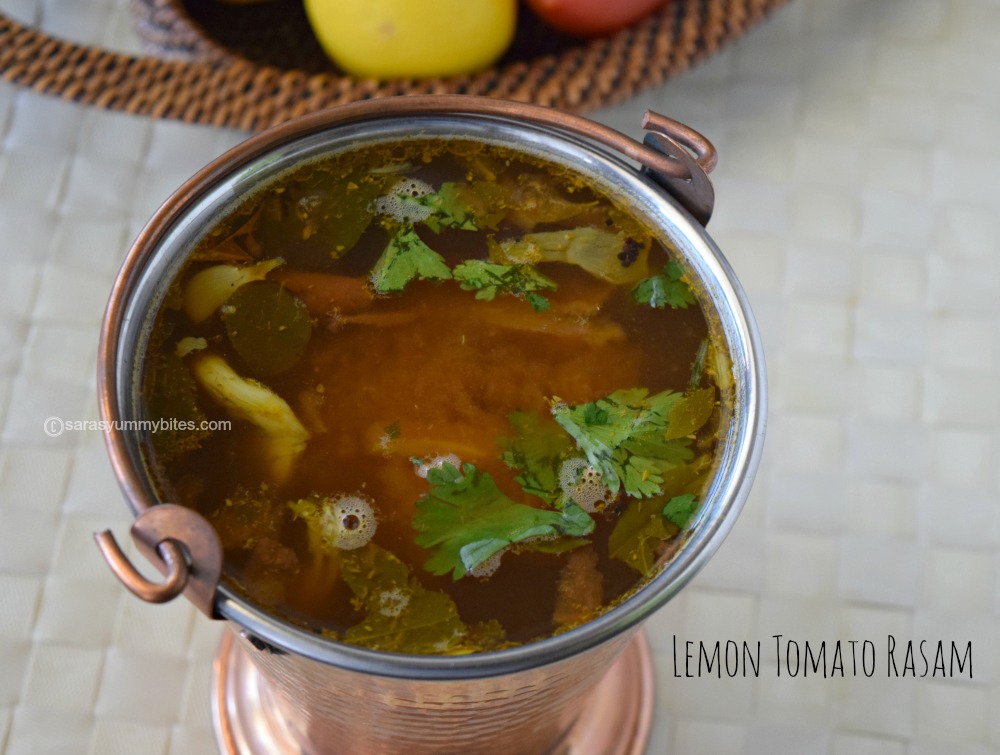
    Elumichai Thakkali Rasam /எலுமிச்சை தக்காளி ரசம் / Lemon Tomato Rasam with out Tamarind and Dhal

    Elimichai Thakkali Rasam /எலுமிச்சை தக்காளி ரசம் / Lemon Tomato Rasam with out Tamarind and Dhal
         I love rasam in any flavors. My meal will not end with out rasam.  It is so comforting and easy dish  one can prepare with out much cooking knowledge. Today there is another rasam recipe from my kitchen,  which is super tangy with wholesome goodness of fresh lemon and tomatoes. Taste delicious and makes you feel light. You can also can also add cooked toor dhal  to your rasam to have slight twist. But do not add tamarind, which will completely change the taste and aroma of this rasam. Now
    Preparation time: 10 minutes
    Cooking time: 20 minutes
    Serves: 3 ~ 4
    Source: Sarasyummybites.com
    Ingredients:
    3 ~ 4 medium size tomatoes, chopped
    1 or 2 big lemons to taste ( I used 1 lemon)
    1 green chili
    ¼ turmeric powder
    ¼ tsp hing / asafoetida
    Cilantro as needed
    For Grinding:
    1 tsp black pepper
    ½ tsp cumin
    For Seasoning:
    1 tbsp oil
    ½ tsp mustard seeds
    2 red chilies, broken in to two
    2 crushed garlic
    1 string curry leaves
    Method:
    1. Boil chopped tomatoes, green chili, turmeric powder, hing and salt with 3 cups of water in medium heat.
    2. When tomatoes become soft and water reduce to half. Gently mash the tomatoes with spatula.
    3. Grind the grinding ingredients in to coarse powder and add it to tomato mixture along with 1 cup of water or more as needed. Bring the mixture to boil. Once the rasam starts to boil, turn of the heat.
    4.  Heat oil or ghee in a skillet, throw in mustard seeds and allow it to crackle. Then add remaining ingredients one by one and fry for few seconds.
    5. Add the seasonings to the rassam. Add cilantro. Adjust salt to taste. Squeeze lemon juice from fresh lemon and add it to rasam.  Once lemon juice is added, don't reheat the rasam. Serve hot with rice.
    Elimichai Thakkali Rasam /எலுமிச்சை தக்காளி ரசம் / Lemon Tomato Rasam with out Tamarind and Dhal
    PRINT HERE
    Elumichai Thakkali Rasam / Lemon Tomato Rasam with out Tamarind and Dhal
    Preparation time: 10 minutes
    Cooking time: 20 minutes
    Serves: 3 ~ 4
    Source: Sarasyummybites.com
    Ingredients:
    3 ~ 4 medium size tomatoes, chopped
    1 or 2 big lemons to taste ( I used 1 lemon)
    1 green chili
    ¼ turmeric powder
    ¼ tsp hing / asafoetida
    Cilantro as needed
    For Grinding:
    1 tsp black pepper
    ½ tsp cumin
    For Seasoning:
    1 tbsp oil
    ½ tsp mustard seeds
    2 red chilies, broken in to two
    2 crushed garlic
    1 string curry leaves
    Method:
    1. Boil chopped tomatoes, green chilli, turmeric powder, hing and salt with 3 cups of water in medium heat.
    2. When tomatoes become soft and water reduce to half. Gently mash the tomatoes with spatula.
    3. Grind the grinding ingredients in to coarse powder and add it to tomato mixture along with 1 cup of water or more as needed. Bring the mixture to boil. Once the rasam starts to boil, turn of the heat.
    4.  Heat oil or ghee in a skillet, throw in mustard seeds and allow it to crackle. Then add remaining ingredients one by one and fry for few seconds.
    5. Add the seasonings to the rassam. Add cilantro. Adjust salt to taste. Squeeze lemon juice from fresh lemon and add it to rasam.  Once lemon juice is added, don't reheat the rasam. Serve hot with rice.
     www.sarasyummyrecipes.com

    Check out the Blogging Marathon page for the other Blogging Marathoners doing BM# 63

    An InLinkz Link-up


    April 6, 2016 Lunch Recipes

    Dadhiyonnam / Temple style Curd Rice / Perumal kovil Thayir Sadaam

    Dadhiyonnam / Temple style Curd Rice /  Perumal kovil Thayir Sadaam

    You will be familiar with this word " Dadhiyonnam" if you are a  frequent visitor to Perumal / Balaji Temple.  If not, dadhiyonnam is a curd rice prepared as a prasadam in most of the temple. It is very simple and easy to prepare. Milk and curd, mixed together with mushy rice and  tempered  with Chana dhal, chopped green chilies, ginger and mustard.  Starch in the rice gives nice consistency to this dish. Try this at your home and you will not miss the divine taste and  flavor..

    Preparation time: 15 minutes
    Cooking time: 30 minutes
    Serves: 3 ~ 4
    Source: sarasyummyrecipes.com
    Ingredients:
    1 cup raw rice
    1 tbsp. butter
    11/2  cups milk or more if needed
    4 tbsp. curd
    Salt to taste
    For Seasoning:
    1 tbsp. sesame oil
    ½ tsp mustard  seeds
    1 tsp channa dhal or as needed
    2 green chills, chopped finely or to taste
    ½ tsp minced fresh ginger
    1 ~ 2 string curry leaves
    Minced cilantro as needed
    Method:
    1.  Cook rice with 3 ½ cups of water till it become soft and mushy. Turn of the heat and allow the rice to cool. Do not drain the excess starch from the rice.
    2. Boil the milk and allow it  cool little bit. Meantime, heat oil in a skillet and add the seasoning ingredients one by one after mustard seeds splutter.
    3. Fry the seasoning ingredients till it become crispy.
    4. Add the seasoning to the cooked rice along with curd, butter and salt.
    5.  Pour in lukewarm milk and mix with spatula to avoid any lumps. Add milk or water to required consistency. Adjust Salt to taste.

    Dadhiyonnam / Temple style Curd Rice /  Perumal kovil Thayir Sadaam
    PRINT HERE
    Dadhiyonnam / Temple style Curd Rice / Perumal kovil Thayir Sadaam
     
    Preparation time: 15 minutes
    Cooking time: 30 minutes
    Serves: 3 ~ 4
    Source: sarasyummyrecipes.com
    Ingredients:
    1 cup raw rice
    1 tbsp. butter
    11/2  cups milk or more if needed
    4 tbsp. curd
    Salt to taste
    For Seasoning:
    1 tbsp. sesame oil
    ½ tsp mustard  seeds
    1 tsp channa dhal or as needed
    2 green chills, chopped finely or to taste
    ½ tsp minced fresh ginger
    1 ~ 2 string curry leaves
    Minced cilantro as needed
    Method:
    1.  Cook rice with 3 ½ cups of water till it become soft and mushy. Turn of the heat and allow the rice to cool. Do not drain the excess starch from the rice.
    2. Boil the milk and allow it  cool little bit. Meantime, heat oil in a skillet and add the seasoning ingredients one by one after mustard seeds splutter.
    3. Fry the seasoning ingredients till it become crispy.
    4. Add the seasoning to the cooked rice along with curd, butter and salt.
    5.  Pour in lukewarm milk and mix with spatula to avoid any lumps. Add milk or water to required consistency. Adjust Salt to taste.
     www.sarasyummyrecipes.com

    Dadhiyonnam / Temple style Curd Rice /  Perumal kovil Thayir Sadaam

    Check out the Blogging Marathon page for the other Blogging Marathoners doing BM# 63

    An InLinkz Link-up

    April 5, 2016 Gravy/ Curry for Rice

    Carrot Rasam / How to make Carrot Rasam

    Carrot Rasam

    Rasam is a comforting food in South India. Even a grand feast will not get completed without rasam.  There are many types of rasam we can make and I attempted making this rasam after tasting this, in one of the restaurant here in Frisco, Tx.  It tasted delicious with aromatic sweet smell of carrot.  I guessed the ingredients and tried at home. To my surprise, it was more tasty  and smell great with freshly ground spices. Try this and I am sure you will love it. Stay tune for another rasam recipe starts with letter "E".

    Preparation time: 10 minutes
    Cooking time: 30 minutes
    Serves: 4
    Ingredients:
    ¼ cup toor dhal
    2 long carrots
    ¼ tsp hing
    1 big size tomato, chopped
    1 green chili
    2 tbsp. thick tamarind juice or to taste
    ½ tsp turmeric powder
    Salt to taste
    Minced Cilantro as needed
    For Grinding:
    1 tbsp. cumin seeds
    ½ tsp black pepper
    1 tsp Coriander seeds
    For Seasoning:
    1 tsp ghee or cooking oil
    ½ tsp mustard seeds
    Curry leaves as needed
    2 red chilies, broken in to pieces or to taste
    2 garlic pods
    Method:
    1. Wash, peel the skin of the carrots and cut it in to two halves. Wash toor dhal and pressure cook with sufficient water along with carrots for 3 ~ 4 whistle. keep it aside.
    2. In separate bowl, take chopped tomato, turmeric powder, tamarind juice, hing, salt and green chilies.
    3. Add 2 cups of water.  Cook and boil it for 10 minutes. Once the pressure drops in pressure cooker,  Open and mash the dhal along with carrots. Before mashing, take one carrot. Chop the cooked carrot and keep it aside.
    4. Pour the mashed carrot dhal mixture to tomato mixture. Add more water if needed. Allow the rasam to cook for few minutes.
    5. Grind the grinding ingredients to coarse powder and add it to rasam. Mix and cook it for 2 minutes. Once done, turn off the heat and cover the rasam with lid or plate.
    6. In a kadai or skillet, heat oil. Once oil is hot, add mustard seeds, allow it to splutter. Then add curry leaves, red chilies and crushed garlic, cooked carrots. Sauté for few seconds in low heat and pour it to rasam. Serve hot with rice.
    Carrot Rasam
    PRINT HERE
    Carrot Rasam
     
    Preparation time: 10 minutes
    Cooking time: 30 minutes
    Serves: 4
    Ingredients:
    ¼ cup toor dhal
    2 long carrots
    ¼ tsp hing
    1 big size tomato, chopped
    1 green chili
    2 tbsp. thick tamarind juice or to taste
    ½ tsp turmeric powder
    Salt to taste
    Minced Cilantro as needed
    For Grinding:
    1 tbsp. cumin seeds
    ½ tsp black pepper
    1 tsp Coriander seeds
    For Seasoning:
    1 tsp ghee or cooking oil
    ½ tsp mustard seeds
    Curry leaves as needed
    2 red chilies, broken in to pieces or to taste
    2 garlic pods
    Method:
    1. Wash, peel the skin of the carrots and cut it in to two halves. Wash toor dhal and pressure cook with sufficient water along with carrots for 3 ~ 4 whistle. keep it aside.
    2. In separate bowl, take chopped tomato, turmeric powder, tamarind juice, hing, salt and green chilies.
    3. Add 2 cups of water.  Cook and boil it for 10 minutes. Once the pressure drops in pressure cooker,  Open and mash the dhal along with carrots. Before mashing, take one carrot. Chop the cooked carrot and keep it aside.
    4. Pour the mashed carrot dhal mixture to tomato mixture. Add more water if needed. Allow the rasam to cook for few minutes.
    5. Grind the grinding ingredients to coarse powder and add it to rasam. Mix and cook it for 2 minutes. Once done, turn off the heat and cover the rasam with lid or plate.
    6. In a kadai or skillet, heat oil. Once oil is hot, add mustard seeds, allow it to splutter. Then add curry leaves, red chilies and crushed garlic, cooked carrots. Sauté for few seconds in low heat and pour it to rasam. Serve hot with rice.
     www.sarasyummyrecipes.com

    Check out the Blogging Marathon page for the other Blogging Marathoners doing BM# 63

    An InLinkz Link-up

    April 3, 2016 Cold Beverages

    Badam Pal / Almond Kheer

    Badam Pal / Almond Milk


    Preparation time: 5 ~ 10 minutes
    Cooking time: 15 minutes
    Yield: 2 ~ 3 
    Source: Sarasyummybites
    Ingredients:
    ¼  cup almonds ( I used deskin almonds)
    ½ cup water
    2 ~ 3 cups milk
    ¼ cup  + 1 tbsp sugar or to taste
    ¼ tsp cardamom powder
    Few saffron strands
    Method:
    1. Soak almonds in warm water for 10 ~ 15 minutes. Drain the water.  Peel and discard the skin.
    2. Grind deskin almonds with ½ cup of water to smooth paste.
    3. Heat the milk and bring it to boil. Add almond paste and saffron. Stir and cook the almond milk for 10 minutes in medium heat. Add more milk if needed.
    4. Add sugar and cardamom powder and cook it for few minutes until sugar dissolves. Serve hot or cool as needed. (If you are serving cool, refrigerate for few hours). Garnish with sliced almonds before serving.
    Badam Pal / Almond Milk
    PRINT HERE
    Badam Pal / Almond Milk
    Preparation time: 5 ~ 10 minutes
    Cooking time: 15 minutes
    Yield: 2 ~ 3 
    Source: Sarasyummybites
    Ingredients:
    ¼  cup almonds ( I used deskin almonds)
    ½ cup water
    2 ~ 3 cups milk
    ¼ cup  + 1 tbsp. sugar or to taste
    ¼ tsp cardamom powder
    Few saffron strands
    Method:
    1. Soak almonds in warm water for 10 ~ 15 minutes. Drain the water.  Peel and discard the skin.
    2. Grind deskin almonds with ½ cup of water to smooth paste.
    3. Heat the milk and bring it to boil. Add almond paste and saffron. Stir and cook the almond milk for 10 minutes in medium heat. Add more milk if needed.
    4. Add sugar and cardamom powder and cook it for few minutes until sugar dissolves. Serve hot or cool as needed. (If you are serving cool, refrigerate for few hours). Garnish with sliced almonds before serving.
     www.sarasyummyrecipes.com

    Check out the Blogging Marathon page for the other Blogging Marathoners doing BM# 63

    An InLinkz Link-up


    April 2, 2016 Festival Recipes

    Aval Urundai / Poha ladoo

    Aval Urundai / Poha ladoo

                         Aval urundai/ Ladoo is one of the simple and traditional festival sweet.  Mostly prepared during Krishna Jayanthi Festival.  There are various method in preparing this delicious sweet but the recipe shared below is my family recipe.   We can replace warm milk instead of ghee for binding. But it will stay good for 2 to 3 day in refrigerator. This recipe goes to mega Blogging Marathon - "Journey through the cuisine". For this mega marathon I am going to travel through "Tamilnadu cuisine" in alphabetical order for this whole month except Sundays. So stay tune for more yummy recipes..
    Preparation time: 25 ~ 30 minutes
    Cooking time: Less than 7 minutes
    Yield: 10 - 12 ladoos as shown in picture 

    Ingredients:

    1 ½ cups red aval / poha
    ½ cup sugar
    2 cardamom pods
    2 tbsp cashews, broken into pieces
    4 tbsp melted ghee or more if needed
    A pinch of salt

     
    Method:

    1. Dry roast the poha in medium flame for few minutes until poha turns crispy. Turn off the heat and allow the fried poha to cool. In the same pan, melt ghee and fry cashews to golden colour. Keep it aside.
    2.  Grind the poha into coarse powder. Transfer the powder to mixing bowl.
    3. In same blender, grind sugar along with cardamom. Mix it with powdered poha. Add pinch of salt to it.

    Aval Urundai / Poha ladoo
     
    4. Mix poha, powdered sugar, fried cashews and add warm ghee little by little to the mixture.
     
    Aval Urundai / Poha ladoo
     
    5.  When mixture is warm, take small lemon shape of poha mixture in your palm and gently squeeze  to bind the mixture to form a ball. Do the same with remaining mixture.
    6. Store poha ladoo in air tight container at room temperature. Stay well for 10 days.
     
    Aval Urundai / Poha ladoo


    PRINT HERE
    Aval Urundai / Poha ladoo
    Preparation time: 25 ~ 30 minutes

    Cooking time: Less than 7 minutes
    Yield: 10 - 12 ladoos as shown in picture
     
    Ingredients:
    1 ½ cups Red aval / poha
    ½ cup sugar 
    2 cardamom pods
    2 tbsp cashews, broken into pieces
    4 tbsp melted ghee or more if needed
    A pinch of salt
     
    Method:
    1. Dry roast the poha in medium flame for few minutes until poha turns crispy. Turn off the heat and allow the fried poha to cool. In the same pan, melt ghee and fry cashews to golden colour. Keep it aside.
    2.  Grind the poha into coarse powder. Transfer the powder to mixing bowl.
    3. In same blender, grind sugar along with cardamom. Mix it with powdered poha. Add pinch of salt to it.
    4. Mix poha, powdered sugar, fried cashews and add warm ghee little by little to the mixture.
    5.  When mixture is warm, take small lemon shape of poha mixture in your palm and gently squeeze  to bind the mixture to form a ball. Do the same with remaining mixture.
    6. Store poha ladoo in air tight container at room temperature. Stay well for 10 days.
     
    Note: you can replace warm milk instead of ghee for binding. Store it in air tight container in refrigerator.
     www.sarasyummyrecipes.com

    Aval Urundai / Poha ladoo

    Check out the Blogging Marathon page for the other Blogging Marathoners doing BM# 63


    Kalan Soup

    March 19, 2016 Mushroom

    Kalan Soup / Chennai Soup Stall Mushroom Soup Recipe / காளான் சூப்

    Kalan Soup / Chennai Soup Stall Mushroom Soup Recipe /  காளான் சூப்
    If you are from Chennai, You never missed this yummy soup from soup stall vander. When Valli gave the theme as street food, I had list of recipes to try  but end up with some quick and yummy recipe which took me back to my Chennai life. Really missing those days :(Kalan/ Mushroom soup is very popular road side dish in Chennai.  When I searched for original road side shop soup recipe in internet, I end up with restaurant style soup recipes where mushrooms are sautéed, pureed and mixed with cream to get rich flavor and creamy texture.  But the roadside mushroom soup is  more like clear soup where corn flour is add to thicken the soup.

    To test my taste buds, I tried with the ingredients which I found and tasted in roadside shop soup which I tasted 5 years before. And my taste buds test was approved with exact taste and texture which I got from my soup. Yeah I very happy with the outcome and it tasted awesome in very bite of corn flakes and mushrooms and it took back to my Chennai days.. Try this at your home and sure you guys will admit what I am saying here.

    ( Note: I believe commercially they use ajinomoto in their recipes to enhance the taste. But I avoided and didn't find any difference of taste in my soup.)

    Preparation time: 10 minutes
    Cooking time: 20 minutes
    Serves: 3 ~ 4
    Source: Sarasyummybites
    Ingredients:
    1 tbsp oil / butter
    1 medium size onion, chopped
    4 ~ 5 fresh mushroom, chopped finely
    1 tsp ginger garlic paste
    4 cups water
    2 tbsp corn flour + 3 tbsp water
    Cilantro as needed
    Powdered black pepper and salt to taste
    Corn flakes chivda as needed
    Method:
    Kalan Soup / Chennai Soup Stall Mushroom Soup Recipe /  காளான் சூப்
    1.  Heat oil in heavy bottom sauce pan in medium heat. Saute chopped onion for few minutes till it turns soft.
    2. Throw in ginger garlic paste and saute for few seconds. Add chopped mushroom. Saute and cook for few minutes.
    3. Add 4 cup of water and allow it to boil. Add salt to taste.  Meantime mix corn flour and 3 tbsp water together without lumps.
    4. When soup starts to boil, Lower the heat, add corn flour mixture to the soup. Stir continuously for few seconds. Soup will starts to thicken up.  Turn off the heat when soup reaches its required consistency. Garnish with minced cilantro.
    5.  Adjust salt and pepper to taste. Transfer it to serving bowl and serve with corn flakes. Enjoy your yummy soup.
    Kalan Soup / Chennai Soup Stall Mushroom Soup Recipe /  காளான் சூப்
    Add caption
    PRINT HERE
    Kalan Soup / Chennai Soup Stall Mushroom Soup Recipe /  காளான் சூப்
    Preparation time: 10 minutes

    Cooking time: 20 minutes
    Serves: 3 ~ 4
    Ingredients:
    1 tbsp oil / butter
    1 medium size onion, chopped
    4 ~ 5 fresh mushroom, chopped finely
    1 tsp ginger garlic paste
    4 cups water
    2 tbsp corn flour + 3 tbsp water
    Cilantro as needed
    Powdered black pepper and salt to taste
    Corn flakes chivda as needed
    Method:
    1.  Heat oil in heavy bottom sauce pan in medium heat. Saute chopped onion for few minutes till it turns soft.
    2. Throw in ginger garlic paste and saute for few seconds. Add chopped mushroom. Saute and cook for few minutes.
    3. Add 4 cup of water and allow it to boil. Add salt to taste.  Meantime mix corn flour and 3 tbsp water together without lumps.
    4. When soup starts to boil, Lower the heat, add corn flour mixture to the soup. Stir continuously for few seconds. Soup will starts to thicken up.  Turn off the heat when soup reaches its required consistency. Garnish with minced cilantro.
    5.  Adjust salt and pepper to taste. Transfer it to serving bowl and serve with corn flakes. Enjoy your yummy soup.
     www.sarasyummyrecipes.com
    Kalan Soup / Chennai Soup Stall Mushroom Soup Recipe /  காளான் சூப்

    Check out the blogging marathon page for the fellow bloggers participating in BM#62.


    March 18, 2016 Snacks

    Vettu Cake / Vetti Cake / Tea stall Fried Cake / Chai Kada Cake / Eggless Vetti cake

    ettu Cake / Vetti Cake / Tea stall Fried Cake /  Chai Kada Cake / Eggless Vetti cake

    Vettu cake / Vetti cake is a popular street food in South India especially in Kerala and Tamilnadu Tea stalls.  Though the name represent cake, it doesn't look and taste like cake.  It has super crunchy texture outside and soft sponge kinda of texture outside like fried donuts.  Usually accompanied by cup of chai or coffee. Try this and you will be amazed, how easy and yummy it is. Stay tune for two more popular street food dishes in coming days.

    Preparation time: 20 minutes
    Proofing time: 30 minutes
    Cooking time: 10 minutes per batch
    Yield: 12 large cakes or 24 medium size cakes
    Adapted from here
    Ingredients:
    1 ¾ cups all purpose flour/ Maida
    ½ tsp baking soda
    ¼ tsp salt
    ½ cup sugar for mild sweetness or you can add more to taste
    ½ cup water or as needed
    ½ tsp cardamom powder
    Oil as required for frying
    Method:
    1. In a mixing bowl, take sugar and water. Mix well to dissolve the sugar.

    2. Sift Maida, baking soda and salt together in another bowl.
    3. Add sifted flour to sugar water along with cardamom powder.

    4. Mix and make it in to smooth dough as we do for chapathi dough using your hand or spatula.
    5. Cover the dough and rest it for 30 minutes.
    6. After 30 minutes, Knead the dough and make it to log. Cut the log in to equal number of pieces and rest it for few second before frying.

    7. Heat oil in a frying pan. Fry the cake in batches for few minutes in low-medium heat. When oil stops the bubbles and the cake is done, remove and drain it on paper towel. Cool completely and  store it in air tight container for 3~4 days or serve hot with cup of tea or coffee.

    PRINT HERE
    Vettu Cake/ Eggless Vettu Cake
    Preparation time: 20 minutes 

    Proofing time: 30 minutes
    Cooking time: 10 minutes per batch
    Yield: 12 large cakes or 24 medium size cakes
    Adapted from here
    Ingredients:
    1 ¾ cups all purpose flour/ Maida
    ½ tsp baking soda
    ¼ tsp salt
    ½ cup sugar
    ½ cup water or as needed
    ½ tsp cardamom powder
    Oil as required for frying
    Method:
    1. In a mixing bowl, take sugar and water. Mix well to dissolve the sugar.
    2. Sift Maida, baking soda and salt together in another bowl.
    3. Add sifted flour to sugar water along with cardamom powder.
    4. Mix and make it in to smooth dough as we do for chapathi dough using your hand or spatula.
    5. Cover the dough and rest it for 30 minutes.
    6. After 30 minutes, Knead the dough and make it to log. Cut the log in to equal number of pieces and rest it for few second before frying.
    7. Heat oil in a frying pan. Fry the cake in batches for few minutes in low-medium heat. When oil stops the bubbles and the cake is done, remove and drain it on paper towel. Cool completely and  store it in air tight container for 3~4 days or serve hot with cup of tea or coffee.

    www.sarasyummyrecipes.com

    Vettu Cake / Vetti Cake / Tea stall Fried Cake /  Chai Kada Cake / Eggless Vetti cake
    Check out the blogging marathon page for the fellow bloggers participating in BM#62.


    March 5, 2016 Cauliflower

    Cauliflower Peas Egg Bhurji

    Cauliflower Peas Egg Bhurji
     
    Preparation time: 15 minutes
    Cooking time: 25 minutes
    Serves: 2~3
     
     
    Ingredients:
    2 eggs
    ½ cup shredded Cauliflower
    ¼ cup fresh or frozen peas ( I used frozen peas)
    1 medium size onion, chopped
    1 medium size tomato, chopped
    1 tsp ginger garlic paste 
    1 tbsp. minced cilantro
     
    Masalas Ingredients:
    2 tsp red chili powder or to taste
    2 tsp coriander powder or to taste
    ¾ tsp garam masala powder
    ½ tsp turmeric powder
    Salt to taste
    Crushed whole pepper as needed
     
    Seasoning Ingredients:
    1 ½ tbsp. cooking oil
    ½ tsp mustard seeds
    ½ tsp cumin seeds
     
    Method:
    1. Clean and wash veggies.  Chop and shred the listed veggies as needed. Separate eggs from shell and keep it aside in a bowl.
    2. Heat oil in a pan and add seasoning ingredients and allow it to splutter.
    3. Throw in onion.  Sauté till it become soft and changes its color.
    4. Add shredded cauliflower and peas. Cook for 5 minutes. Stir in between.
    5. When the veggies become soft and half cooked, add ginger garlic paste. Mix and cook for 1 minute.
    6. Throw in chopped tomato and cook along with cauliflower peas till it become soft and mushy.
    7. Throw in masala powders( except pepper) and salt. Stir to blend the masalas to the veggies. Taste and adjust salt and spice as required.
    8. Add eggs to the mixture and stir to mix. Lower the heat slightly and cook it till it done. Stir in between to cook the eggs thoroughly. Add crushed pepper if needed. Mix once along with cilantro and transfer it to serving bowl. Serve hot with roti or with rice.

    Cauliflower Peas Egg Bhurji

    PRINT HERE
    Cauliflower Peas Egg Bhurji


    Preparation time: 15 minutes
    Cooking time: 25 minutes
    Serves: 2~3
    Sources: Sarasyummybites
     
    Ingredients:
    2 eggs
    ½ cup shredded Cauliflower
    ¼ cup fresh or frozen peas ( I used frozen peas)
    1 medium size onion, chopped
    1 medium size tomato, chopped
    1 tsp ginger garlic paste 
    1 tbsp minced cilantro
     
    Masalas Ingredients:
    2 tsp red chili powder or to taste
    2 tsp coriander powder or to taste
    ¾ tsp garam masala powder
    ½ tsp turmeric powder
    Salt to taste
    Crushed whole pepper as needed
     
    Seasoning Ingredients:
    1 ½ tbsp cooking oil
    ½ tsp mustard seeds
    ½ tsp cumin seeds
     
    Method:
    1. Clean and wash veggies.  Chop and shred the listed veggies as needed. Separate eggs from shell and keep it aside in a bowl.
    2. Heat oil in a pan and add seasoning ingredients and allow it to splutter.
    3. Throw in onion.  Saute till it become soft and changes its color.
    4. Add shredded cauliflower and peas. Cook for 5 minutes. Stir in between.
    5. When the veggies become soft and half cooked, add ginger garlic paste. Mix and cook for 1 minute.
    6. Throw in chopped tomato and cook along with cauliflower peas till it become soft and mushy.
    7. Throw in masala powders( except pepper) and salt. Stir to blend the masalas to the veggies. Taste and adjust salt and spice as required.
    8. Add eggs to the mixture and stir to mix. Lower the heat slightly and cook it till it done. Stir in between to cook the eggs thoroughly. Add crushed pepper if needed. Mix once along with cilantro and transfer it to serving bowl. Serve hot with roti or with rice.
     

     www.sarasyummyrecipes.com

    Check out the blogging marathon page for the fellow bloggers participating in BM#62.


    March 4, 2016 Egg Recipes

    Egg Bhurji / Anda Bhurji / Muttai Masala

    Egg Bhurji is easy and quick to make recipe in absences of meat and seafood in our pantry. It can be used in many ways like stuffing in paratha roll, as masala in dosa and also like a filling in samosas or puffs. Egg Bhurji is very famous in North India and also popular street food which goes very well with all Indian breads.
    Preparation time: 15 minutes
    Cooking minutes: 15 minutes
    Serves: 2~3
    Sources: Sarasyummybites
    Ingredients:
    4 eggs
    1 medium size onion, chopped
    1 medium size tomato, chopped
    1 tsp ginger garlic paste
    Minced Cilantro as needed
    Masala Ingredients:
    2 tsp coriander powder or to taste
    2 tsp red chili powder or to taste
    ½ tsp garam masala
    ¼ tsp turmeric powder
    Salt to taste
    Seasoning Ingredients:
    1 tbsp. oil
    ½ tsp cumin seeds
    Method:
    Preparation:
    1. Clean and wash the veggies before chopping.  Break the eggs in a bowl and discard the shell.
    Cooking:
    2. Heat oil in a pan, add cumin to pop.  Add onion to it. Sauté till it become soft.  Then add chopped tomatoes and sauté till it become soft and mushy.
    3. Add ginger garlic paste, stir for few minutes. Low the heat and add all masala powder to onion tomato mixture.
    4. Mix masalas to the mixture and cook it for 2 or 3 minutes till raw smell disappear from the mixture. Adjust salt and specie to taste.
    5. Pour the eggs to the mixture. Mix it and cook for few minutes. Stir till eggs gets scrambled texture and cooked very well.
    6. Add minced cilantro to the scrambled eggs. Add Crushed pepper, if needed. Serve hot with roti or rice.
    PRINT HERE
    Egg Bhurji/ Anda Bhurji / Muttai Masala
    Preparation time: 15 minutes
    Cooking minutes: 15 minutes
    Serves: 2~3
    Ingredients:
    4 eggs
    1 medium size onion, chopped
    1 medium size tomato, chopped
    1 tsp ginger garlic paste
    Minced Cilantro as needed
    Masala Ingredients:
    2 tsp coriander powder or to taste
    2 tsp red chilli powder or to taste
    ½ tsp garam masala
    ¼ tsp turmeric powder
    Salt to taste
    Seasoning Ingredients:
    1 tbsp oil
    ½ tsp cumin seeds
    Method:
    Preparation:
    1. Clean and wash the veggies before chopping.  Break the eggs in a bowl and discard the shell.
    Cooking:
    2. Heat oil in a pan, add cumin to pop.  Add onion to it. Saute till it become soft.  Then add chopped tomatoes and saute till it become soft and mushy.
    3. Add ginger garlic paste, stir for few minutes. Low the heat and add all masala powder to onion tomato mixture.
    4. Mix masalas to the mixture and cook it for 2 or 3 minutes till raw smell disappear from the mixture. Adjust salt and spiece to taste.
    5. Pour the eggs to the mixture. Mix it and cook for few minutes. Stir till eggs gets scrambled texture and cooked very well.
    6. Add minced cilantro to the scrambled eggs. Add Crushed pepper, if needed. Serve hot with roti or rice.

    www.sarasyummybites.

    Check out the blogging marathon page for the fellow bloggers participating in BM#62.

    March 3, 2016 Side dish for Rice

    Tofu Bhurji / Scrambled Tofu / Vegan Bhurji


    Tofu Bhurji / Scrambled Tofu / Vegan Bhurji
                      Hi All. It’s been awhile since my last blog, quite busy for all these months. And I truly appreciate all of the love and support I’ve constantly received from y'all. 🙂  
      I am happy to be back in Blogging marathon. And I am starting with 3 different Bhurji recipes and today I am going to share vegan recipe. Yes! it is Tofu Bhurji! Tofu, or bean curd, is a popular food derived from soya. It is made by curdling fresh soya milk. This soy cheese is excellent substitute for eggs and paneer. Since tofu is very bland, It can be easily blended with any type of spices and masalas. And because of its texture, it goes very well in place of scrambled eggs.
        Bhurji is a popular dish in north and western India and Pakistan which is mainly refers to scrambled eggs. With little interest and creativity, we can create 'N' numbers of bhurji recipes other than eggs. Let us check todays recipe.
    Preparation time: 10 ~ 15 minutes
    Cooking time: 20 ~ 25 minutes
    Yield: 2 ~3
    Ingredients:
    12 oz / 340 grams extra firm tofu
    1 nos / 70 grams medium onion, chopped
    1 nos / 50 grams tomato, chopped
    1 tsp / 5 grams ginger garlic paste ( I used crushed one)
    Minced cilantro
    Masala powder Ingredients
    ¼ tsp turmeric powder
    1 tbsp sambhar powder (or)
    1 ½ tsp red chilli powder & 1 ½ tsp coriander powder
    ½ tsp garam masala
    ½ tsp crushed pepper or to taste
    Salt to taste
    Seasoning Ingredients:
    1 tbsp oil
    ¼  tsp mustard seeds (optional)
    ½ tsp fennel seeds (optional)
    1 string curry leaves (optional)
    Method:
    1. Wash and peel onion and chop it finely. Wash tomato and chop it.
    2. Drain the water from tofu completely and scramble it. Keep it aside.
    Cooking:
    3. Heat oil in heavy bottom pan, add mustard seeds, allow it to splutter. Then add fennel seeds followed by ginger garlic paste, curry leaves.
    Tofu Bhurji / Scrambled Tofu Bhurji / Vegan Bhurji

    4. Throw in onion and sauté till it become transparent then add chopped tomato. Sauté till it become soft and mushy.

    Tofu Bhurji / Scrambled Tofu Bhurji / Vegan Bhurji

    5. When oil separates from the mixture, add masala ingredients as listed.
    6. Mix and fry the mixture for or 2 minutes. Adjust salt and spice to taste.

    Tofu Bhurji / Scrambled Tofu Bhurji / Vegan Bhurji

    7. Finally add scrambled tofu and cook for 5 minutes. Stir in between. (If need add crushed pepper)
    8. Add minced cilantro. Mix and transfer it to serving bowl.  Serve hot with rice or roti.

    Tofu Bhurji / Scrambled Tofu Bhurji / Vegan Bhurji
    PRINT HERE
    Tofu Bhurji / Vegan Tofu Bhurji
    Preparation time: 10 ~ 15 minutes 

    Cooking time: 20 ~ 25 minutes
    Yield: 2 ~3

    Ingredients:
    12 oz / 340 grams extra firm tofu
    1 nos / 70 grams medium onion, chopped
    1 nos / 50 grams tomato, chopped
    1 tsp / 5 grams ginger garlic paste
    Minced cilantro

    Masala powder Ingredients
    ¼ tsp turmeric powder
    1 tbsp sambhar powder (or)
    1 ½ tsp red chilli powder & 1 ½ tsp coriander powder
    ½ tsp garam masala
    ½ tsp crushed pepper or to taste
    Salt to taste

    Seasoning Ingredients:
    1 tbsp oil
    ¼  tsp mustard seeds (optional)
    ½ tsp fennel seeds (optional)
    1 string curry leaves (optional)

    Method:
    1. Wash and peel onion and chop it finely. Wash tomato and chop it.
    2. Drain the water from tofu completely and scramble it. Keep it aside.

    Cooking:
    3. Heat oil in heavy bottom pan, add mustard seeds, allow it to splutter. Then add fennel seeds followed by ginger garlic paste, curry leaves.
    4. Throw in onion and sauté till it become transparent then add chopped tomato. Sauté till it become soft and mushy.
    5. When oil separates from the mixture, add masala ingredients as listed.
    6. Mix and fry the mixture for or 2 minutes. Adjust salt and spice to taste.
    7. Finally add scrambled tofu and cook for 5 minutes. Stir in between. ( If needed add crushed pepper)
    8. Add minced cilantro. Mix and transfer it to serving bowl.  Serve hot with rice or roti.

    www.sarasyummyrecipes.com

    Tofu Bhurji / Scrambled Tofu

    Check out the blogging marathon page for the fellow bloggers participating in BM#62.


    May 14, 2015 Baked Recipes

    Iyengar Bakery Khara Buns / Bakery Style Spicy Buns

    Iyengar Bakery Khara Buns / Bakery Style Spicy Buns
                  My Childhood memories I remember is like yesterday.. The aroma from the bakery near my home filled the entire area. Who ever passing that road will automatically stops to get some baked delicacy to their home. And one of their specialty was "Khara Buns".  My sisters and me will go to this bakery while returning to home from school to buy this hot spicy buns to snack on.   They were so delicious with hint of spicyness with wonderful flavors.  Those were innocent days with lots fun and memories to preserve 🙂
                 When Priya Suresh suggested 4 bun recipe for this month "Home Baker Challenge". I picked this khara bun recipe which refreshed my memories and made me feel good.   Enjoyed making them  and my kids too loved it and asked me to bake them often. And I am surprised to see my little one eating those buns with out completing about spicyness.

    Preparation time: 45 minutes 
    Proofing time:  
    15 minutes for yeast
    1 ~ 1 ½  hour for 1 rising and 30 ~ 45 minutes for second rising
    Baking time: 25~ 30 minutes
    Yield :  6 jumbo buns as shown in picture or more depends on size  
    Recipe Source: eatliveburp

    Ingredients:

    For Buns:
    2 cups all purpose flour +more for kneading
    1 ½ tsp active dried yeast
    ¼ cup+1 tbsp milk
    ½ cup water
    1 ½ tsp sugar
    3 tbsp butter
    1 tsp salt
    For Masalas:
    ¾ cup finely chopped onions
    5-6 Thai green chilies, minced ( I used 2 Serrano peppers)
    ⅓ cup cilantro leaves, finely chopped
    1 teaspoon cumin seeds
    10 curry leaves, chopped (or add any herbs as per your wish)
    1 teaspoon oil
    Salt to taste
    Iyengar Bakery Khara Buns / Bakery Style Spicy Buns
    Method:
    Proofing  the yeast:
    1. Microwave water and milk together for 30 seconds ( use stove top to warm the milk and water), it should be warm to touch. ( This is important for yeast to proof).
    2.  Add sugar and yeast and mix well. Let it sit for 15 minutes. The yeast mixture should be frothy at the end of 15 minutes. If not, start the process again.

    Preparing masala: 
    3. When yeast is proofing, Heat oil in a pan or skillet.  When its hot add cumin seeds, let it splutter.    Add finely chopped green chilies and curry leaves.  Cook for a minute.
    4. Then add chopped onions,  salt and saute till it turn soft.  Add cilantro leaves, mix well and turn off the heat. Allow it to cool meantime don't kill the yeast. ( Follow step 5 when onion is cooking, this is important for not spoiling yeast).


    Preparing bun dough:
    5. When onion is cooking, melt 2 tablespoons of butter and add it to the yeast along with salt and mix well.
    6. Transfer the yeast mixture to mixing bowl, Add flour, one cup at a time to the yeast mixture and whisk until you get a smooth dough.


    7. Transfer the dough to a floured surface and knead it into a smooth, non-sticky dough. Add more flour if required and knead well for at least 10 minutes. If you are using stand mixture, follow the above step and knead it for 10 minutes  in low setting.
    8. Flatten the kneaded dough with your hands or as shown in picture and place the onion-chili stuffing in the center. Fold the corners and seal it well.

    9. Knead again for 15 minutes by hand or stand mixture, till the stuffing is well incorporated in the dough. The dough might turn sticky due to the onions, so add more flour and knead well. I added extra ¼ cup of flour to get non sticky dough.

    10. Grease a big bowl with little oil and place the kneaded dough in the bowl. Cover with a clean kitchen towel and keep in a warm place till the dough almost doubles ( I kept in oven with lights ON and it took about 1 hour).

    11. After the first rise, knead again for 7-8 minutes to remove any air bubbles in the dough.
    12. Divide the dough into 6 ~ 8 equal portions and shape into buns. Place them on a parchment sheet lined baking tray.
    13. Cover and place the baking tray in a warm place for about 30 ~ 45 minutes.

    Baking:
    14. At the end of 45 minutes, preheat oven to 425 F.
    15. Brush tops of well risen dough with milk and place them in the oven.
    16. Reduce oven temperature to 350 F. Bake for 20-25 minutes until the top is slightly brown and the buns sound hollow when tapped on top. This make about 25 ~ 28 minutes.


    17. Melt 1 tablespoon of butter and brush tops of baked buns for a nice shine. After few minutes, transfer it to cooling rack. Cool completely before storing.  I kept in ziplock bag and stayed fresh for 2 day at room temperature.

    Iyengar Bakery Khara Buns / Bakery Style Spicy Buns
    PRINT HERE
    Iyengar Bakery Khara Buns / Bakery Style Spicy Buns 
    Preparation time: 45 minutes  
    Proofing time:  
    15 minutes for yeast
    1 ~ 1 ½  hour for 1 rising and 30 ~ 45 minutes for second rising
    Baking time: 25~ 30 minutes
    Yield :  6 jumbo buns as shown in picture or more depends on size  
    Recipe Source: eatliveburp
    Ingredients:

    For Buns:
    2 cups all purpose flour +more for kneading
    1 ½ tsp active dried yeast
    ¼ cup+1 tbsp milk
    ½ cup water
    1 ½ tsp sugar
    3 tbsp butter
    1 tsp salt

    For Masalas:
    ¾ cup finely chopped onions
    5-6 Thai green chilies, minced ( I used 2 Serrano peppers)
    ⅓ cup cilantro leaves, finely chopped
    1 teaspoon cumin seeds
    10 curry leaves, chopped (or add any herbs as per your wish)
    1 teaspoon oil
    Salt to taste

    Method:
    Proofing  the yeast:
    1. Microwave water and milk together for 30 seconds ( use stove top to warm the milk and water), it should be warm to touch. ( This is important for yeast to proof).
    2.  Add sugar and yeast and mix well. Let it sit for 15 minutes. The yeast mixture should be frothy at the end of 15 minutes. If not, start the process again.

    Preparing masala: 
    3. When yeast is proofing, Heat oil in a pan or skillet.  When its hot add cumin seeds, let it splutter.    Add finely chopped green chilies and curry leaves.  Cook for a minute.
    4. Then add chopped onions,  salt and saute till it turn soft.  Add cilantro leaves, mix well and turn off the heat. Allow it to cool meantime don't kill the yeast. ( Follow step 5 when onion is cooking, this is important for not spoiling yeast).


    Preparing bun dough:
    5. When onion is cooking, melt 2 tablespoons of butter and add it to the yeast along with salt and mix well.
    6. Transfer the yeast mixture to mixing bowl, Add flour, one cup at a time to the yeast mixture and whisk until you get a smooth dough.
    7. Transfer the dough to a floured surface and knead it into a smooth, non-sticky dough. Add more flour if required and knead well for at least 10 minutes. If you are using stand mixture, follow the above step and knead it for 10 minutes  in low setting.
    8. Flatten the kneaded dough with your hands or as shown in picture and place the onion-chili stuffing in the center. Fold the corners and seal it well.
    9. Knead again for 15 minutes by hand or stand mixture, till the stuffing is well incorporated in the dough. The dough might turn sticky due to the onions, so add more flour and knead well. I added extra ¼ cup of flour to get non sticky dough.
    10. Grease a big bowl with little oil and place the kneaded dough in the bowl. Cover with a clean kitchen towel and keep in a warm place till the dough almost doubles ( I kept in oven with lights ON and it took about 1 hour).
    11. After the first rise, knead again for 7-8 minutes to remove any air bubbles in the dough.
    12. Divide the dough into 6 ~ 8 equal portions and shape into buns. Place them on a parchment sheet lined baking tray.
    13. Cover and place the baking tray in a warm place for about 30 ~ 45 minutes.

    Baking:
    14. At the end of 45 minutes, preheat oven to 425 F.
    15. Brush tops of well risen dough with milk and place them in the oven.
    16. Reduce oven temperature to 350 F. Bake for 20-25 minutes until the top is slightly brown and the buns sound hollow when tapped on top. This make about 25 ~ 28 minutes.
    17. Melt 1 tablespoon of butter and brush tops of baked buns for a nice shine. After few minutes, transfer it to cooling rack. Cool completely before storing.  I kept in ziplock bag and stayed fresh for 2 day at room temperature.

    www.sarasyummyrecipes.com

    May 14, 2015 Festival Recipes

    Pillayarpatti Mothagam / Pillayarpatti Kozhukattai / Pillayarpatti Prasadam ~ Modagam

    Pillayarpatti Mothagam
    Third day on Temple Traditional Prasadam series, we are going to see about my favorite God - Lord Ganesha's prasadam, from ancient temple "Pillayarpatti". Pillayarpatti is located near Thiruppathur, Sivagangai District of Tamil Nadu.  Lord Vinayagar is carved out from the rock of the cave. This temple is the only one in Tamil Nadu which contains a 6 feet rock-cut Pillayar deity. Lets see how to make this traditional  parasadam at home.
    As we all know, Mothagam is must for Pillayar and parasadam served in this temple is so different when compare to other mothagam. Where roasted rice and moong dhal are powdered to rawa consistency and cooked in jaggery water. Then steamed into balls.
     This yummy mothagam had wonderful texture and mild sweetness. Try this recipe and leave your valuable feedback.
    Sharing this recipe to Blogging Marathon 52 under the theme " Traditional Temple Recipes". Do Check  Blogging Marathon page for the other Blogging Marathoners doing BM#52.
    Preparation time: 20 minutes
    Cooking time 10 minutes per batch
    Yield: 15 ~ 18 mathagam
    Ingredients:
    ¾ cup of raw rice
    ¼ cup of moong dhal
    ¼ cup jaggery or add more as neeeded
    Pinch of salt
    1 tbsp ghee
    2 tbsp coconut pieces (optional)
    ¼ tsp of cardamom powder
    2 cups + 2 tbsp water or as needed
    Pillayarpatti Mothagam
    Method:
    1. Heat heavy bottom pan and dry roast rice and moong dhal separately. Let it cool to room temperature.
    2. Mean time dissolve jaggery in water. Heat the mixture and strain it through the tea strainer to remove impurities from the jaggery.
    3. Bring the jaggery water to boil.  At the same time, using mixer grinder,  powder dhal and rice in to rava consistency ( coarse ).

    Pillayarpatti Mothagam
    4. Add the powdered mixture to boiling jaggery water along with salt, ghee, coconut pieces( if you are using), cardamom powder. Mix the mixture continuously.
    5. After couple of minutes, rice dhal mixture bubbles up. Lower the heat. Cover and cook the mixture. Stir in-between.

    6.  When water evaporates, check the consistency.  Wet your hand and pinch little of cooked mixture and roll it, it should not stick to your hands. If you are able to roll the mixture without sticking with smooth shape, then turn of the heat and allow it cool to handle OR cook more for couple of minutes and follow the same step.

    7. Grease the pan or idly plates with oil or cover it with cloth.  Grease your palms and roll it into bite size balls and place it into greased idly plates.

    8. Steam the mothagam for 10 minutes.  If mothagam cooked more then 10 minutes it will become rubbery.

    9. After 2 minutes, remove the lid and remove the mothagam and place it to other bowl. Serve warm or at room temperature.
    PRINT HERE
    Pillayarpatti Mothagam / Pillayarpatti Kozhukattai  
    Preparation time: 20 minutes

    Cooking time 10 minutes per batch
    Yield: 15 ~ 18 mothagam

    Ingredients:
    ¾ cup of raw rice
    ¼ cup of moong dhal
    ¼ cup jaggery or add more as neeeded
    Pinch of salt
    1 tbsp ghee
    2 tbsp coconut pieces (optional)
    ¼ tsp of cardamom powder
    2 cups + 2 tbsp water or as needed

    Method:
    1. Heat heavy bottom pan and dry roast rice and moong dhal separately. Let it cool to room temperature.
    2. Mean time dissolve jaggery in water. Heat the mixture and strain it through the tea strainer to remove impurities from the jaggery.
    3. Bring the jaggery water to boil.  At the same time, using mixer grinder,  powder dhal and rice in to rava consistency ( coarse ).
    4. Add the powdered mixture to boiling jaggery water along with salt, ghee, coconut pieces( if you are using), cardamom powder. Mix the mixture continuously.
    5. After couple of minutes, rice dhal mixture bubbles up. Lower the heat. Cover and cook the mixture. Stir inbetween.
    6.  When water evaporates, check the consistency.  Wet your hand and pinch little of cooked mixture and roll it, it should not stick to your hands. If you are able to roll the mixture without sticking with smooth shape, then turn of the heat and allow it cool to handle OR cook more for couple of minutes and follow the same step.
    7. Grease the pan or idly plates with oil or cover it with cloth.  Grease your palms and roll it into bite size balls and place it into greased idly plates.
    8. Steam the mothagam for 10 minutes.  If mothagam cooked more then 10 minutes it will become rubbery.
    9. After 2 minutes, remove the lid and remove the mothagam and place it to other bowl. Serve warm or at room temperature.

    www.sarasyummyrecipes.com

    Pillayarpatti Mothagam


    May 12, 2015 Festival Recipes

    Sabarimala Prasadam / Aravana Payasam / அரவைண பாயசம்

    Sabarimala Prasadam / Aravana Payasam / அரவைண  பாயசம்
      “Appam and Aravana” are the two major prasadam of  Sabarimala Sree Ayyappa Temple.  This delicious payasam is also name as " Nei Payasam" and  "Kadum Payasam" which is very easy to make at home with very few ingredients.  Sharing this recipe to Blogging Marathon 52 under the theme " Traditional Temple Recipes". Do Check  Blogging Marathon page for the other Blogging Marathoners doing BM#52.
    Preparation time: 15 minutes
    Cooking time: 25 ~ 30 minutes
    Serves: 1 bowl as shown in picture
    Sources: sarasyummybites
    Ingredients:
    ¼ cup red raw rice or pori rice or basmati rice ( I used basmati)
    2 ~ 3 tbsp ghee or as needed
    1 cup jaggery ( brown jaggery)
    1 tsp cardamom, powdered
    Few coconut pieces, chopped
    ¾ cup + 2 tbsp water for jaggery
     
    Method:
    1. Shred the jaggery ball and measure it in to 1 cup. I used measuring cup and you can also use any cup but use the same cup for measuring rice and ghee.
    2. Dissolve the jaggery and filter it through tea strainer to remove impurities.  Set aside til use.
    3. Wash rice 3 to 4 times with cold water and drain the water through strainer and keep it aside.
    4. Chop the coconut slices into small pieces.
    Cooking:
    5.  Heat heavy bottom pan with 1 tbsp of ghee, fry coconut pieces till it turns golden brown color. In the same pan, fry rice for 1 ~ 2 minutes in medium heat. Don't fry the rice crispy.
    6. Add ½ cup of water and cook the rice to 80% or until water evaporates. Stir in prepared jaggery syrup  to the rice.


    7. Mix rice and jaggery mixture ( add extra water, if it is too thick for you)  and 1 tbsp of ghee. Stir    continuously for a minute and cook it in medium heat.
    8. When mixture boils and reaches a thick sauce like consistency, turn off the heat.

    9. Add cardamom powder and fried coconut over to the payasam and mix once.
    10.  Store it in airtight container and keeps well for longer time.Note:
    * Always use dark brown jaggery ( Pagu vellam)
    * 80% cooked rice will give grainy texture as shown in picture or cook more with extra water as needed
    * if you or not able to dissolve the jaggery, then slight heat the jaggery to melt it down.
    * Adjust water to your required consistency.

    Sabarimala Prasadam / Aravana Payasam / அரவைண  பாயசம்
    PRINT HERE
    Sabarimala Prasadam / Aravana Payasam
    Preparation time: 15 minutes
    Cooking time: 25 ~ 30 minutes
    Serves: 1 bowl as shown in picture
    Sources: sarasyummybites
    Ingredients:
    ¼ cup red raw rice or pori rice or basmati rice ( I used basmati)
    2 ~ 3 tbsp ghee or as needed
    1 cup jaggery ( brown jaggery)
    1 tsp cardamom, powdered
    Few coconut pieces, chopped
    ¾ cup + 2 tbsp water for jaggery
     
    Method:
    1. Shred the jaggery ball and measure it in to 1 cup). I used measuring cup and you can use any cup but use the same cup for measuring rice and ghee)
    2. Dissolve the jaggery and filter it through tea strainer to remove impurities.  Set aside til use.
    3. Wash rice 3 to 4 times with cold water and drain the water through strainer and keep it aside.
    4. Chop the coconut slices into small pieces.
    Cooking:
    5.  Heat heavy bottom pan with 1 tbsp of ghee, fry coconut pieces till it turns golden brown color. In the same pan, fry rice for 1 ~ 2 minutes in medium heat. Don't fry the rice crispy.
    6. Add ½ cup of water and cook the rice to 80% or until water evaporates. Stir in prepared jaggery syrup  to the rice.
    7. Mix rice and jaggery mixture ( add extra water, if it is too thick for you)  and 1 tbsp of ghee. Stir    continuously for a minute and cook it in medium heat.
    8. When mixture boils and reaches a thick sauce like consistency, turn off the heat.
    9. Add cardamom powder and fried coconut over to the payasam and mix once.
    10.  Store it in airtight container and keeps well for longer time.

    Note:
    * Always use dark brown jaggery ( Pagu vellam)
    * 80% cooked rice will give grainy texture as shown in picture or cook more with extra water as needed
    * if you or not able to dissolve the jaggery, then slight heat the jaggery to melt it down.
    * Adjust water to your required consistency.

    www.sarasyummyrecipes.com

    Sabarimala Prasadam / Aravana Payasam / அரவைண  பாயசம்


    Kovil Puliyodarai

    May 11, 2015 Festival Recipes

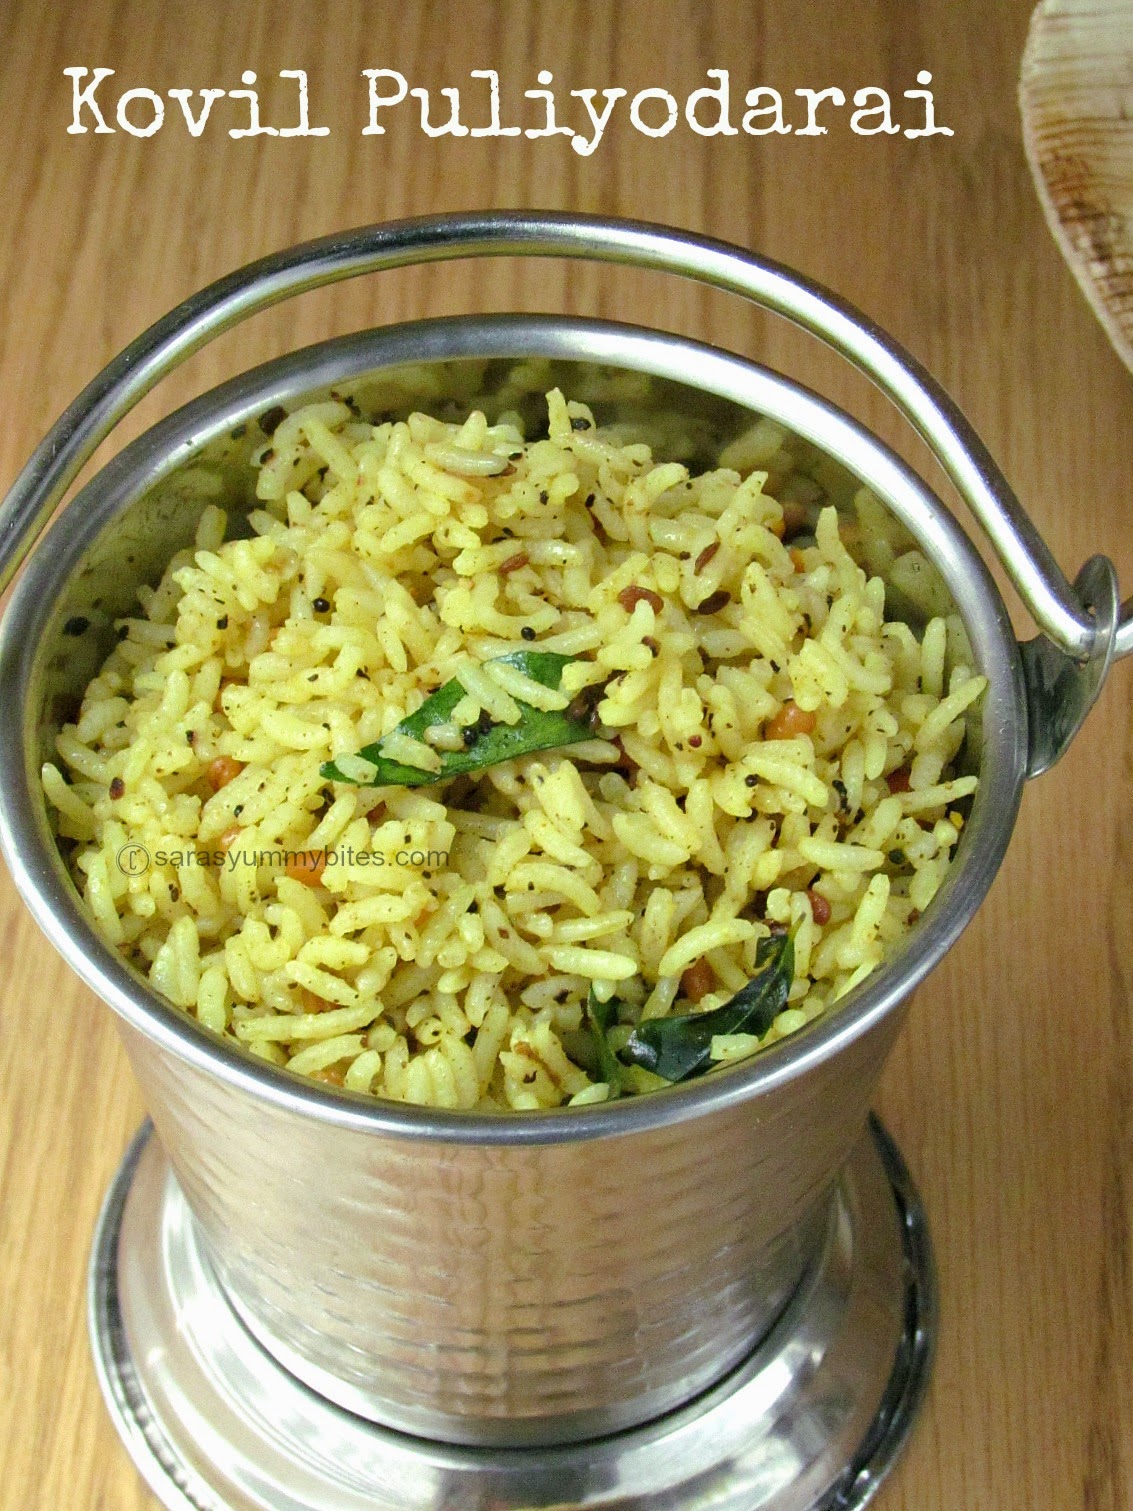
    Kovil Puliyodarai / Milagu Puliyodarai / Temple Tamarind rice

    Kovil Puliyodarai / Milagu puliyodarai

    Parasadam is food that has first been offered to God and then offered to His deitys. Each and Every temple as it own unique prasadam, like Thirupati Ladoo, Srivilliputhur Palkova, Pazhani Panchamirtham.  And all Perumal temple is famous for Perumal theertham (Holy water) and puliyodarai.  Been born and bought up in Triplicane, I am very much attached to Parthasarathy temple. I have lot of memories related to Parthasarathy temple.

              One of my childhood Muslim friend always ask me to get extra pulisadam and vadai from Parathasarathy temple for her, when ever I visit the temple. It tastes thats good. Even thought we replicate the original  parsadam recipes in our home, it still miss the divine taste which we get in temples.

    Sharing this recipe to Blogging Marathon 52 under the theme " Traditional Temple Recipes". Do Check  Blogging Marathon page for the other Blogging Marathoners doing BM#52.

    Always prepare this recipe with freshly ground peppercorns, which give unique taste and flavour to this dish.

    Preparation time: 20 ~ 30 minutes
    Cooking time: 30 minutes
    Yield: 3 ~ 4
    Source: sarasyummybites
    Ingredients:
    1 cup raw rice
    20 grams / small lime size tamarind
    Salt to taste
    For Seasoning:
    30 ml / 2 tbsp sesame oil + 1 tsp oil for rice
    ½ tsp mustard seeds
    ¼ tsp fenugreek seeds
    ½ tsp cumin / jeera
    20 grams / 1.5 tbsp channa dhal
    20 grams 1.5 tbsp urad dhal
    ¼ tsp asafoetida/ hing
    ½ tsp turmeric powder
    Cashews broken into pieces (optional)
    ¾ ~1 tsp freshly ground pepper corns or more to taste
    Curry leaves as needed
    Method:
    For rice:
    1. Wash the rice for 3 ~ 4 times with water and soak it for 20 minutes.
    2. Cook the rice with open pot method or using rice cooker with 2 cups of water.
    3. Spread the cooked rice on the big plate and cool it completely.
    For Pulikachal:
    4. While rice is cooking soak the tamarind with ¼ cup of warm water for few minutes. Gently squeeze the soaked tamarind with your fingers and strain the juice in separate bowl. Add extra ¼ cup of warm water and extract the remaining juice from the tamarind and mix both the tamarind juice together and keep it aside.
    5.  Heat oil in a heavy bottom pan or kadai in medium heat.
    6. When oil gets hot, add mustard seeds, allow it to splutter.  Then add jeera, channa dhal, urad dhal, jeera, fenugreek seeds, hing and  curry leaves(then add cashew).
    7. when seasoning ingredients get roasted to golden brown color, pour in extracted tamarind juice, turmeric powder and salt.
    8. Boil the mixture in medium heat till reduce it to half and looks like a thick sauce consistency. At this stage oil will separate from the mixture.
    9. Now add freshly ground raw pepper and adjust salt (spice) to taste.  Mix once and turn off the heat.
    Preparing puliyodarai:
    10.  In a large and wide mixing bowl, mix puliyodarai mixture with cooled rice gently until masala spread evenly over the rice.
    11. Add 1 tbsp of raw sesame / gingerly oil to the rice mixture and mix once. Adjust salt to taste.
    12. Serve at room temperature or best to served after 4 ~ 5 hours from mixing the rice with masala. Will stay fresh for 2 ~ 3 hours at room temperature when packed in container which is not air tight one.

    Kovil Puliyodarai
    PRINT HERE
     Kovil Puliyodarai / Milagu Puliyodarai 
    Preparation time: 20 ~ 30 minutes

    Cooking time: 30 minutes
    Yield: 3 ~ 4
    Source: sarasyummybites
    Ingredients:
    1 cup raw rice
    20 grams / small lime size tamarind
    Salt to taste
    For Seasoning:
    30 ml / 2 tbsp sesame oil +  1 tsp oil for rice
    ½ tsp mustard seeds
    ¼ tsp fenugreek seeds
    ½ tsp cumin / jeera
    20 grams / 1.5 tbsp channa dhal
    20 grams 1.5 tbsp urad dhal
    ¼ tsp asafoetida/ hing
    ½ tsp turmeric powder
    Cashews broken into pieces (optional)
    ¾ ~1 tsp freshly ground pepper corns or more to taste
    Curry leaves as needed
    Method:
    For rice:
    1. Wash the rice for 3 ~ 4 times with water and soak it for 20 minutes.
    2. Cook the rice with open pot method or using rice cooker with 2 cups of water.
    3. Spread the cooked rice on the big plate and cool it completely.
    For Pulikachal:
    4. While rice is cooking soak the tamarind with ¼ cup of warm water for few minutes. Gently squeeze the soaked tamarind with your fingers and strain the juice in separate bowl. Add extra ¼ cup of warm water and extract the remaining juice from the tamarind and mix both the tamarind juice together and keep it aside.
    5.  Heat oil in a heavy bottom pan or kadai in medium heat.
    6. When oil gets hot, add mustard seeds, allow it to splutter.  Then add jeera, channa dhal, urad dhal, jeera, fenugreek seeds, hing and  curry leaves(then add cashew).
    7. when seasoning ingredients get roasted to golden brown color, pour in extracted tamarind juice, turmeric powder and salt.
    8. Boil the mixture in medium heat till reduce it to half and looks like a thick sauce consistency. At this stage oil will separate from the mixture.
    9. Now add freshly ground raw pepper and adjust salt (spice) to taste.  Mix once and turn off the heat.
    Preparing puliyodarai:
    10.  In a large and wide mixing bowl, mix puliyodarai mixture with cooled rice gently until masala spread evenly over the rice.
    11. Add 1 tbsp of raw sesame / gingerly oil to the rice mixture and mix once. Adjust salt to taste.
    12. Serve at room temperature or best to served after 4 ~ 5 hours from mixing the rice with masala. Will stay fresh for 2 ~ 3 hours at room temperature when packed in container which is not air tight one.

    www.sarasyummyrecipes.com

    Kovil Puliyodarai


    May 2, 2015 Baked Recipes

    Single Serving Lemon Coconut Cake ( Eggless)

     Single Serving Lemon Coconut Cake ( Eggless)

    We have come to end of month long Blogging Marathon successfully and I cant believe a month has passed just like that.  And for this week,  I posted Single serving "Eggless" recipes, which are mess free and tasted great with minimal effect.  Today recipe is flavorful cake which have mild sweetness from coconut milk with tint of lemon aroma.  Great to snack any time of the day!!

    Preparation time: 5 minutes
    Baking time: 15 ~ 20 minutes
    Serves 1
    Adapted from here
    Ingredients:
    4 tbsp. all purpose flour
    ¼ tsp baking powder
    2 ½ tbsp. granulated sugar
    Pinch of salt
    4 tbsp. full fat coconut milk ( If you don't get full fat milk then add 1 tbsp butter @ room temperature)
    1 tsp coconut flakes
    ¼ tsp lemon zest
    Method:
    1. Preheat the oven to 350 F and grease the ramekin with butter.
    2. In a mixing bowl,  combine all the ingredients expect lemon zest and coconut flakes.
    3. Stir with a small whisk until batter is smooth. Then mix in coconut flakes and lime zest.
    Baking:
    4.  Transfer the batter to prepared pan and bake it for 15 ~ 20 minutes or microwave it for 1 minute. Cool little bit and top it with reserved coconut flakes, lemon zest and serve.

    PRINT HERE
     Single Serving Lemon Coconut Cake ( Eggless) 
    Preparation time: 5 minutes
    Baking time: 15 ~ 20 minutes
    Serves 1Ingredients:
    4 tbsp. all purpose flour
    ¼ tsp baking powder
    2 ½ tbsp. granulated sugar
    Pinch of salt
    4 tbsp. full fat coconut milk ( If you don't get full fat milk then add 1 tbsp butter @ room temperature)
    1 tsp coconut flakes
    ¼ tsp lemon zest

    Method:
    1. Preheat the oven to 350 F and grease the ramekin with butter.
    2. In a mixing bowl,  combine all the ingredients expect lemon zest and coconut flakes.
    3. Stir with a small whisk until batter is smooth. Then mix in coconut flakes and lime zest.

    Baking:
    4.  Transfer the batter to prepared pan and bake it for 15 ~ 20 minutes or microwave it for 1 minute. Cool little bit and top it with reserved coconut flakes, lemon zest and serve.

    www.sarasyummyrecipes.com

     Single Serving Lemon Coconut Cake ( Eggless)


    Check out the Blogging Marathon page for the other Blogging Marathoners doing BM# 51

    An InLinkz Link-up


    May 2, 2015 Baked Recipes

    Single Serving Eggless Peanut Butter Cake

    Single Serving Eggless Peanut Butter Cake
    Preparation time: 5 minutes
    Baking time: 15 ~ 20 minutes
    Serves: 1
    Ingredients:
    4 tbsp all-purpose flour
    ¼ tsp baking powder
    4 tsp granulated sugar
    Pinch of salt 
    4 tbsp fat-free milk
    3 tbsp smooth peanut butter
    Method: 
    1. Preheat the oven to 350 F and grease one muffin cup or one ramekin pan, 
    2. Combine all ingredients in mixing bow using fork or whisk.  Batter will thick.
    3. Transfer the batter to prepared ramekin and smooth the batter with back of the spoon, to get smooth surface.
    Baking:
    4. Bake it in preheated oven for 15 ~ 20 minutes or till done OR microwave it for 1 minutes. Cool the cake for few minutes before eating. 
    PRINT HERE
    Single Serving Eggless Peanut Butter Cake

    Preparation time: 5 minutes
    Baking time: 15 ~ 20 minutes
    Serves: 1

    Ingredients:
    4 tbsp all-purpose flour
    ¼ tsp baking powder
    4 tsp granulated sugar
    Pinch of salt
    4 tbsp fat-free milk
    3 tbsp smooth peanut butter

    Method: 
    1. Preheat the oven to 350 F and grease one muffin cup or one ramekin pan,
    2. Combine all ingredients in mixing bow using fork or whisk.  Batter will thick.
    3. Transfer the batter to prepared ramekin and smooth the batter with back of the spoon, to get smooth surface.

    Baking:
    4. Bake it in preheated oven for 15 ~ 20 minutes or till done OR microwave it for 1 minutes. Cool the cake for few minutes before eating.

     www.sarasyummyrecipes.com


    Single Serving Eggless Peanut Butter Cake

    Check out the Blogging Marathon page for the other Blogging Marathoners doing BM# 51

    An InLinkz Link-up


    May 1, 2015 Baked Recipes

    Single Serving Choco Chip Cookie

    Single Serving Choco Chip Cookie
    Preparation time: 5 minutes
    Baking time: 14 minutes
    Serves: 1
    Ingredients:
    4 tbsp all purpose flour 
    Pinch of salt
    ¼ tsp baking soda
    2 tbsp sugar
    1 tbsp butter
    1 tbsp or more chocolate chips
    1 tbsp milk or water
    ⅛ tsp vanilla extract
    Single Serving Choco Chip Cookie
    Method:
    1. Preheat the oven to 350F,  Grease cookie baking tray with butter.
    2. In a mixing bowl, mix all ingredients together and gently roll between your palm. Before rolling,    grease butter to your palms to avoid sticking of  cookie dough.
    3. Gently flatten it and place it on the prepared tray.
    Baking:
    4. Bake the cookie for 14 minutes in preheated oven. Once done, remove and place it on cooling rack and allow it to cool. Enjoy it while warm or at room temperature.

    PRINT HERE
    Single Serving Choco Chip Cookie
    Preparation time: 5 minutes

    Baking time: 14 minutes
    Serves: 1

    Ingredients:
    4 tbsp all purpose flour
    Pinch of salt
    ¼ tsp baking soda
    2 tbsp sugar
    1 tbsp butter
    1 tbsp or more chocolate chips
    1 tbsp milk or water
    ⅛ tsp vanilla extract

    Method:
    1. Preheat the oven to 350F,  Grease cookie baking tray with butter.
    2. In a mixing bowl, mix all ingredients together and gently roll between your palm.    Before rolling, grease butter to your palms to avoid sticking of  cookie dough.
    3. Gently flatten it and place it on the prepared tray.

    Baking:
    4. Bake the cookie for 14 minutes in preheated oven. Once done, remove and place it on cooling rack and allow it to cool. Enjoy it while warm or at room temperature.

     www.sarasyummyrecipes.com


    Single Serving Choco Chip Cookie

    Check out the Blogging Marathon page for the other Blogging Marathoners doing BM# 51/a>

    An InLinkz Link-up

    May 1, 2015 Baked Recipes

    Single Serving Eggless Coffee Cake

    Single Serving Eggless Coffee Cake

    Preparation time: 5 minutes
    Baking time: 14 ~ 16 minutes
    Serve: 1
    Adapted from here


    Ingredients for cake :
    Dry Ingredients:
    ¼ cup all purpose flour
    ¼ tsp baking powder
    Pinch of salt

    Wet Ingredients:
    1 tbsp butter / oil
    2 tbsp sugar
    1 ½ tsp flex seed + 1/ ½ tbsp water
    2 tbsp yogurt
    ½ tsp vanilla

    For crumb topping:
    1 tbsp butter @ room temperature
    2 tbsp all purpose flour
    1 tbsp brown sugar
    1 tsp cinnamon powder

    Single Serving Eggless Coffee Cake

    Method:
    1. Preheat the oven for 350F.  Grease baking pan or ramekin.
    2. In a small mixing bowl, cream melted butter and sugar together.
    3. Mix in soaked flex mixture along with yogurt and Vanilla.
    4. Stir in dry ingredients and mix to corporate. Pour the mixture to prepared pan.

    Single Serving Eggless Coffee Cake

    For Topping:
    5.  In a small mixing bowl, mix the crumb ingredients with your finger and keep it aside till use.


    Baking:

    Single Serving Eggless Coffee Cake


    6. Bake the cake for 7 minutes in preheated oven. Then remove the cake and top it topping and put back to bake for another 7 minutes or 1 or 2 minutes to more till tooth pick inserted in center comes out clean.

    Single Serving Eggless Coffee Cake
    PRINT HERE
    Single Serving Eggless Coffee Cake
    Preparation time: 5 minutes  

    Baking time: 14 ~ 16 minutes
    Serve: 1
    Adapted from here

    Ingredients for cake :
    Dry Ingredients:
    ¼ cup all purpose flour
    ¼ tsp baking powder
    Pinch of salt
    Wet Ingredients:
    1 tbsp butter / oil
    2 tbsp sugar
    1 ½ tsp flex seed + 1/ ½ tbsp water
    2 tbsp yogurt
    ½ tsp vanilla
    For crumb topping:
    1 tbsp butter @ room temperature
    2 tbsp all purpose flour
    1 tbsp brown sugar
    1 tsp cinnamon powder
    Method:
    1. Preheat the oven for 350F.  Grease baking pan or ramekin.
    2. In a small mixing bowl, cream melted butter and sugar together.
    3. Mix in soaked flex mixture along with yogurt and Vanilla.
    4. Stir in dry ingredients and mix to corporate. Pour the mixture to prepared pan.
    For Topping:
    5.  In a small mixing bowl, mix the crumb ingredients with your finger and keep it aside till use.

    Baking:
    6. Bake the cake for 7 minutes in preheated oven. Then remove the cake and top it topping and put back to bake for another 7 minutes or 1 or 2 minutes to more till tooth pick inserted in center comes out clean.

     www.sarasyummyrecipes.com


    Single Serving Eggless Coffee Cake

    Check out the Blogging Marathon page for the other Blogging Marathoners doing BM# 51

    An InLinkz Link-up


    April 29, 2015 Baked Recipes

    Single Serving Eggless Chocolate Cupcake

    Single Serving Eggless Chocolate Cupcake

    Preparation time: 5 minutes
    Baking time: 14 ~ 17 minutes
    Serves: 1
    Adapted from here

    Dry Ingredients:
    1 tbsp + 2 tsp cocoa powder
    3 tbsp all purpose flour or wheat flour
    ⅛ tsp salt
    1 tbsp + 2 tsp sugar
    ¼ tsp baking powder
    Wet Ingredients:
    1 tbsp applesauce
    3 tbsp milk
    ½ tsp vanilla extract

    Single Serving Eggless Chocolate Cupcake
    Method:
    Preparation: 
    1. Preheat oven to 350 F and grease muffin pan or 1 ramekin with oil.
    2. Combine dry ingredients and stir in wet ingredients. Mix well.

    Single Serving Eggless Chocolate Cupcake
    Baking:
    3. Pour in prepared pan and bake it for 14 ~ 17 minutes OR  microwave 60 seconds on high.
    4. Cool before removing for the pan, Enjoy with your choice of frosting.

    Single Serving Eggless Chocolate Cupcake
    PRINT HERE
    Single Serving Eggless Chocolate Cupcake
    Preparation time: 5 minutes

    Baking time: 14 ~ 17 minutes
    Serves: 1

    Dry Ingredients:
    1 tbsp + 2 tsp cocoa powder
    3 tbsp all purpose flour or wheat flour
    ⅛ tsp salt
    1 tbsp + 2 tsp sugar
    ¼ tsp baking powder
    Wet Ingredients:
    1 tbsp applesauce
    3 tbsp milk
    ½ tsp vanilla extract
    Method:
    Preparation: 
    1. Preheat oven to 350 F and grease muffin pan or 1 ramekin with oil.
    2. Combine dry ingredients and stir in wet ingredients. Mix well.
    Baking:
    3. Pour in prepared pan and bake it for 14 ~ 17 minutes OR  microwave 60 seconds on high.
    4. Cool before removing for the pan, Enjoy with your choice of frosting.

    www.sarasyummyrecipes.com

    Single Serving Eggless Chocolate Cupcake

    Check out the Blogging Marathon page for the other Blogging Marathoners doing BM# 51

    An InLinkz Link-up


    April 29, 2015 Baked Recipes

    Single Serving Eggless Choco Chip Muffin

    Single Serving Eggless Choco Chip Muffin

    Preparation time: 5 minutes
    Baking time 15 ~ 17 minutes
    Serves: 1 no
    Adapted from here


    Dry Ingredients:
    3 tbsp white whole wheat flour or all-purpose flour
    ¼ tsp baking powder
    Pinch of salt
    1 ½ tbsp semi-sweet chocolate chips or nuts or fruits

    Wet Ingredients:
    ½ tsp vanilla extract
    1 tbsp cooking oil or butter, melted
    1 tbsp + 1 tsp milk
    1 tbsp sugar

    Method:

    1. Preheat oven to 350 F. Grease or  Line muffin pan or ramekin with 1 liner. Set aside.
    2. Mix flour, baking powder, salt, and chocolate chips together in a small bowl.
    3. Add vanilla, melted butter, milk, and sugar. Mix everything together until just combined. Don't over mix.
    4. Transfer batter into prepared muffin liner.

    Baking:
    5. Bake for 17 minutes or until a toothpick inserted in the center comes out clean.

    Single Serving Eggless Choco Chip Muffin
    PRINT HERE
    Single Serving Eggless Choco Chip Muffin
    Preparation time: 5 minutes
    Baking time 15 ~ 17 minutes
    Serves: 1 no
    Dry Ingredients:
    3 tbsp white whole wheat flour or all-purpose flour
    ¼ tsp baking powder
    Pinch of salt
    1 ½ tbsp semi-sweet chocolate chips or nuts or fruits
    Wet Ingredients:
    ½ tsp vanilla extract
    1 tbsp cooking oil or butter, melted
    1 tbsp + 1 tsp milk  
    1 tbsp sugar
    Method:
    1. Preheat oven to 350 F. Grease or  Line muffin pan or ramekin with 1 liner. Set aside.
    2. Mix flour, baking powder, salt, and chocolate chips together in a small bowl. 
    3. Add vanilla, melted butter, milk, and sugar. Mix everything together until just combined. Don't over mix.
    4. Transfer batter into prepared muffin liner.
    Baking:
    5. Bake for 17 minutes or until a toothpick inserted in the center comes out clean. 

     www.sarasyummyrecipes.com

    Single Serving Eggless Choco Chip Muffin

    Check out the Blogging Marathon page for the other Blogging Marathoners doing BM# 51

    An InLinkz Link-up


    April 28, 2015 Baked Recipes

    Basic Focaccia Bread

    Basic Focaccia Bread
             Focaccia is a type of flat Italian bread that is baked in the oven. The term focaccia is derived from the Latin Panis focaccias which means bread that is baked in the ashes. Focaccia can be topped with a variety of toppings ranging from rosemary and sea salt to different types of cheese, herbs, vegetables and even fruit.        This lovely recipe was challenged by Rachael of pizzarossa and Sawsan of  chefindisguise for "Daring Bakers". And this is my first time in baking focaccia bread and I love the texture, flavor of it.  Thanks Rachael and Sawsan for this wonderful recipe and I am sharing the same for Blogging Marathon.

    Preparation time: 15 minutes
    Baking time: 
    Servings: 8 slices 
    Adapted from here
    Ingredients:
    2-¾ cups (660 ml) (385 gm) (13½ oz) all-purpose (plain) flour
    1 teaspoon (5 ml) (6 gm) salt
    1 teaspoon (5 ml) (5 gm) white sugar
    1 tablespoon (15 ml) (8½ gm) active dry yeast
    1 teaspoon (5 ml) (3 gm) garlic powder
    1 teaspoon (5 ml) (3 gm) dried oregano
    1 teaspoon (5 ml) (3 gm) dried thyme
    ½ teaspoon dried basil
    1 pinch ground black pepper
    1 tablespoon (15 ml) vegetable oil
    1¼  cups (300 ml) milk
    2 tablespoon (30 ml) (15 gm) (½ oz) grated Parmesan cheese (optional)
    Method:
    1.  In a bowl mix the milk, yeast and sugar and wait until it becomes foamy and bubbly.
    2.  In a large bowl, stir together the flour, salt, , garlic powder, oregano, thyme, basil,  parmesan cheese and black pepper.

    3. Mix in the vegetable oil, then add the milk-yeast mixture. Using stand mixer or with a wooden spoon, Mix in till the dough has pulled together, turn it out onto a lightly floured surface, and knead until smooth and elastic  or run stand-mixer at setting "2" for 10 minutes with dough hook to knead the dough.

    4.  Lightly oil a large bowl, place the dough in the bowl, and turn to coat with oil. Cover with a damp cloth, and let rise in a warm place until it doubles in size.


    5.  At the end of proofing time,  preheat oven to hot 450°F/230°C/gas mark 8. Punch dough down the dough; place on greased baking sheet.

    6.  Pat into a ½ -inch (15 mm) thick rectangle or any shape you desire. Use your fingertips to give the dough the dimples effect, pushing gently all over the surface of the dough.


    7.  Place any topping or  Brush top generously with olive oil. Sprinkle salt and oregano.

    8. Allow the dough to rest for 10-15 minutes.
    9. Bake in preheated hot 450°F/230°C/gas mark 8 oven for 15 minutes, or until the sides begin to brown then place under the broiler (grill) till the top becomes golden brown. Serve warm.
    PRINT HERE
    Basic Focaccia Bread
    Preparation time: 15 minutes 

    Baking time: 
    Servings: 8 slices 
    Adapted from here

    Ingredients:
    2-¾ cups (660 ml) (385 gm) (13½ oz) all-purpose (plain) flour
    1 teaspoon (5 ml) (6 gm) salt
    1 teaspoon (5 ml) (5 gm) white sugar
    1 tablespoon (15 ml) (8½ gm) active dry yeast
    1 teaspoon (5 ml) (3 gm) garlic powder
    1 teaspoon (5 ml) (3 gm) dried oregano
    1 teaspoon (5 ml) (3 gm) dried thyme
    ½ teaspoon dried basil
    1 pinch ground black pepper
    1 tablespoon (15 ml) vegetable oil
    1¼  cups (300 ml) milk
    2 tablespoon (30 ml) (15 gm) (½ oz) grated Parmesan cheese (optional)

    Method:
    1.  In a bowl mix the milk, yeast and sugar and wait until it becomes foamy and bubbly.
    2.  In a large bowl, stir together the flour, salt, , garlic powder, oregano, thyme, basil,  parmesan cheese and black pepper.
    3. Mix in the vegetable oil, then add the milk-yeast mixture. Using stand mixer or with a wooden spoon, Mix in till the dough has pulled together, turn it out onto a lightly floured surface, and knead until smooth and elastic  or run stand-mixer at setting "2" for 10 minutes with dough hook to knead the dough.
    4.  Lightly oil a large bowl, place the dough in the bowl, and turn to coat with oil. Cover with a damp cloth, and let rise in a warm place until it doubles in size.
    5.  At the end of proofing time,  preheat oven to hot 450°F/230°C/gas mark 8. Punch dough down the dough; place on greased baking sheet.
    6.  Pat into a ½ -inch (15 mm) thick rectangle or any shape you desire. Use your fingertips to give the dough the dimples effect, pushing gently all over the surface of the dough.
    7.  Place any topping or  Brush top generously with olive oil. Sprinkle salt and oregano.
    8. Allow the dough to rest for 10-15 minutes.
    9. Bake in preheated hot 450°F/230°C/gas mark 8 oven for 15 minutes, or until the sides begin to brown then place under the broiler (grill) till the top becomes golden brown. Serve warm.

    www.sarasyummyrecipes.com

    Basic Focaccia Bread

    Check out the Blogging Marathon page for the other Blogging Marathoners doing BM# 51

    An InLinkz Link-up


    • « Go to Previous Page
    • Page 1
    • Page 2
    • Page 3
    • Page 4
    • Interim pages omitted …
    • Page 22
    • Go to Next Page »

    Primary Sidebar

    Recipe Categories

    Recent Posts

    • Paal Pongal
    • Karnataka Special Ellu Bella / Sesame jaggery
    • Ellu Burfi/ Sesame Chikki/ Till Chikki
    • Andhra Idli Karam / Idli Podi
    • Tomato Pappu/ Tomatillo Pappu/ Thakkali paruppu kadaiyal/ Green tomato dal

    Footer

    South Indian Recipes

    Pongal Recipes, Traditional paal pongal, Mattu Pongal, Simple rice
    Vanjaram Varuval
    Lemon Tomato Rasam
    Cauliflower Egg Fry Poriyal
    Kovil Puliyodarai

    Shrimp Kuzhambhu
    Mushroom Briyani
    Egg Omlet Briyani
    Chettinadu Shrimp/ Eral Briyani
    Mutton Briyani

    Shrimp Dum Briyani

    Footer

    ↑ back to top

    About

    • Privacy Policy
    • Disclaimer
    • Terms & Conditions
    • Accessibility Policy

    Newsletter

    • Sign Up! for emails and updates

    Contact

    • Contact
    • Services
    • Media Kit
    • FAQ

    As an Amazon Associate I earn from qualifying purchases.

    Copyright © 2020 Brunch Pro on the Brunch Pro Theme